Category Archives: Creativity

iDraw A4 Acrylic Version Review

A few weeks ago I was contacted by the distributors of iDraw Generative Machines with a proposition: I could receive an iDraw plotter in exchange an honest review.

Those of you who have read my blog before probably know that I am really interested in the intersections of art and technology. Those of you who have read my blog before probably also noticed that the blog hasn’t been active for a while. This is due to a lot of things — primarily because I’ve shifted my focus away from coding a little bit to enroll in a year long art program.

I’ve improved my artistic skills tremendously this past year and I’ve continued to code in the capacity of a bootcamp instructor – teaching for Practicum by Yandex, an online program which I’ve really enjoyed working at. However when opportunities like this come along I’m rarely one to turn them down. Especially in this case, because I realized I could do really cool things with my paintings if I had a pen plotter that could draw things like fractals which would be really time consuming for me to draw myself. Not to mention it can also cut vinyl. The possibilities!
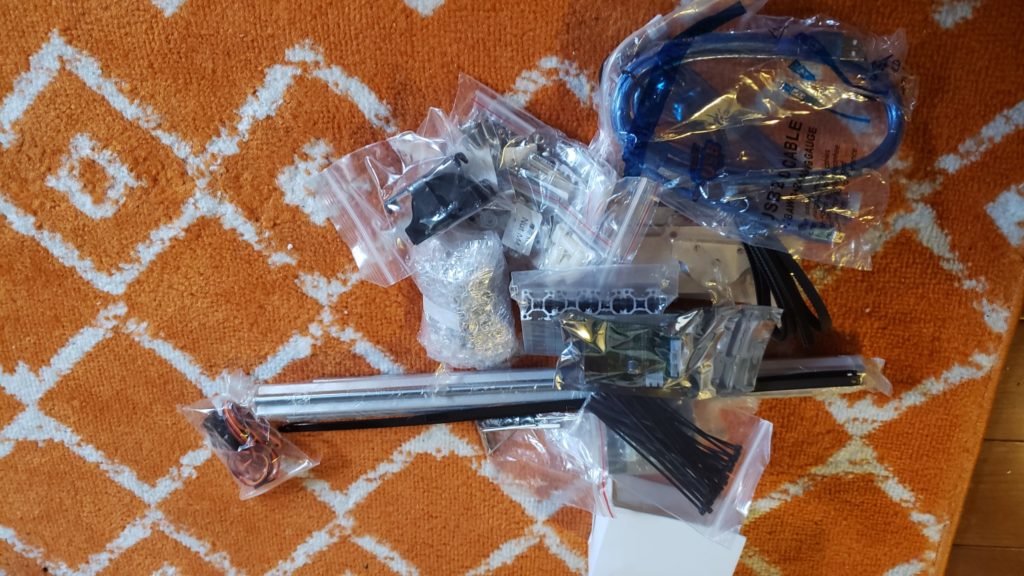
idraw unassembled on the floor in pieces
The pieces of the iDraw A4 Acrylic.. before assembly

What I didn’t realize when I agreed to review the iDraw while getting excited imagining all the things I could do was that the machine is very much a DIY contraption. Meaning, it arrives in a million different pieces and requires a great deal of time and attention to detail in order to put together. Granted I should have perused the links that were sent to me more carefully but I would be lying if I didn’t say my heart sank a little when I opened the box and saw all the little screws and cables inside. It should have also occurred to me that the price tag was simply too low for them to bring you a fully assembled machine – a quick google search will show you assembled pen plotters can go for $250 or more pretty easily.

That being said, I’ve never shied away from a challenge so after recovering from my initial disappointment, I went to work. And let me tell you friends, it WAS work. Of course if you are an expert at DIY or you have a lot of experience with Raspberry PI and that sort of thing, this might not seem so challenging to you. The extent of my expertise with building and assembling things would be putting together furniture from IKEA. This is a whole other level from IKEA, though. First of all, the pieces are much smaller. Second of all, there are more ways to put things together in the wrong orientation. Third of all, the instructions have parts where you have to refer to videos that are hard to see all the details (like which side of the belt faces which way, for instance).

The video above is a time lapse compressing about 2 hours of work assembling the device into about 5 minutes. There were moments when I became very frustrated and wanted to throw the whole thing out of the window but I am glad I persevered. After 2 hours my phone died and I was too focused on assembly to record the rest.

One thing to note – it took me a little while to find the assembly guide for the version I had but once I did things went along much faster. A review of the iDraw wouldn’t be complete without covering the parts I struggled with the most:

  1. Attaching the covers to the back of the two ends where the motors are situated. I would tighten the screws on the opposite side of the t-nuts but the t-nuts would not revolve and so would not lock into the opposite side like they were supposed to (page 28 of the assembly guide) . I seriously just gave up on this. Maybe I will glue them – we’ll see.
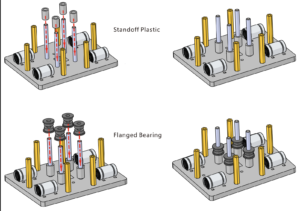
  2. Attaching the two panels with the linear bearings together. I was holding it upside down while stacking the flanged bearing and standoff plastic and then forgot it wasn’t attached at the bottom so I lifted it momentarily off the table and everything fell apart. Then later on I guess I didn’t tighten the nuts enough because the whole middle piece fell apart while I was attaching the ends and was MUCH harder to put together that time because I didn’t want to take all the other pieces apart again. (page 14 of the assembly guide)
  3. The belt. Oh my god the belt. I thought I had it right following the video instructions but either something got screwed up after I first ran the machine or I just didn’t quite put it in correctly but this was the most time consuming part by far. You have to tie the belt off at the ends after you wind it through the 4 different sections of the plotter. In my case the ends of the belt kept coming untied and was driving me insane. After hours of fiddling and messing around with the software I finally realized that the belt wasn’t wrapping around the pulley part of the motor but instead had somehow slid up above it. This screwed up the tension in the belt and cause it to slide up in other crucial areas where it needed to be aligned to the pieces which make it turn smoothly.
  4. The pen was going up when it should go down and down when it should go up. I wish I had googled it sooner because as soon as I did I found someone with the same issue and it turns out that you can actually adjust this in the Inkscape Axidraw extension (Axidraw has an extensive wiki which helped a lot for the software portion). There are basically two bars you can adjust, one which is labelled “DOWN” and one “UP.” What is a lot less obvious is you can actually adjust the bars to make “UP” be down and “DOWN” be up. Very confusing, but it worked for my purposes
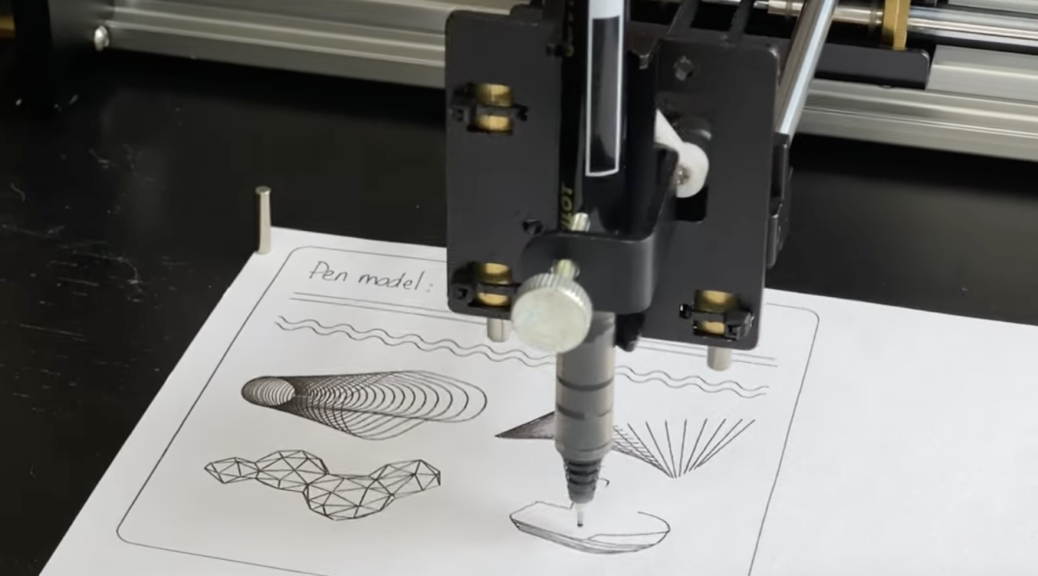
Okay, so I’ve gone through the whole assembly process and probably made it pretty clear its not the easiest thing in the world. But more important than the challenges of assembly is the result, right? Was it worth all my pain and effort? So far I would say yes. It’s an incredibly cool machine, and for the purposes of my art the sky is the limit for what I can create. As an artist I love to paint free, loose, and a little messy. But having this tool will make it so I can incorporate little details and elements in my work that I couldn’t otherwise. It’s also just really fun to watch it go. Honestly its more entertaining than a lot of reality shows that are out there.

Now that the assembly is behind me I’m feeling very excited again – I have lots of ideas for things I can make and sell. Thinking about opening a new etsy shop and creating some more video content of the machine at work.

If the thought of assembling this plotter sounds intimidating and you’re not sure you’re up for it, there are some plotters which come partially assembled and are for sure easier to work with.

Here is a video of my first time running a more complex drawing on the machine. Note that I had to pause it part way because I realized that my pen wasn’t depositing enough ink so I had to switch pens and shifted the drawing slightly in the process.

Of course I’m planning on using much more than a pen when I work on my future projects. I’d like to experiment with markers, paintbrushes, and of course a laser once I figure out where to get one. It would be cool to do wood burning with a laser but I’m not sure a compatible one is powerful enough. I will update this iDraw review with more info as I figure it out. Of course there are also a lot of options with vinyl cutting. I’m impressed with how it can draw such thin and precise lines.

If you enjoyed this article, consider following me on Twitter @nadyaprimak or if you need more tips on breaking into the tech industry, you can read my book “Foot in the Door”.
3 Lesser Known Apps to Create Digital Art

I’ve been in a creative slump lately. I think this is a common but rarely discussed problem for people who transition from arts careers into programming. On one hand, having a well paying remote job means you don’t have to worry about being a starving artist and probably still have some free time to play with apps to create digital art. On the other hand, there can be periods of time where work takes up all your time and you don’t have the energy at the end of the day to make art.

Since we are all in this quarantine crisis, I’ve been trying to tap into my creative side again but it hasn’t been easy. I enrolled in an illustration course on Domestika for discovering your artistic style and have been stuck on the very first project – drawing myself as an animal. It seemed like it should be a fun experimental thing but whenever I had a moment the thought of putting pencil to paper filled me with a strange horror. I had no idea why. I think I was terrified that all of the creativity had been drained out of me and there was nothing left, but I’m still not sure.

My art professor from college once told me that I was one of those types of people that needed to create. If I didn’t create, I would go insane. I think she was right. I also think there is a class of developers who identify as artists but want the flexibility and benefits that a job in the tech industry provides. So they look for developer niches where they can express themselves creatively. One of these niches that I have been dabbling in lately is that of building apps for artists.

In previous blog posts I talked about creative coding frameworks that can be used by programmers to create art, but in this post I am talking about software that doesn’t require coding to be used at all. I think we are seeing growth in the world of apps for artists, which is fantastic. I hope that we continue to see growth because creating art brings joy and by extension, so do tools that allow people to experiment with creating art in new ways.

Electric Zine Maker

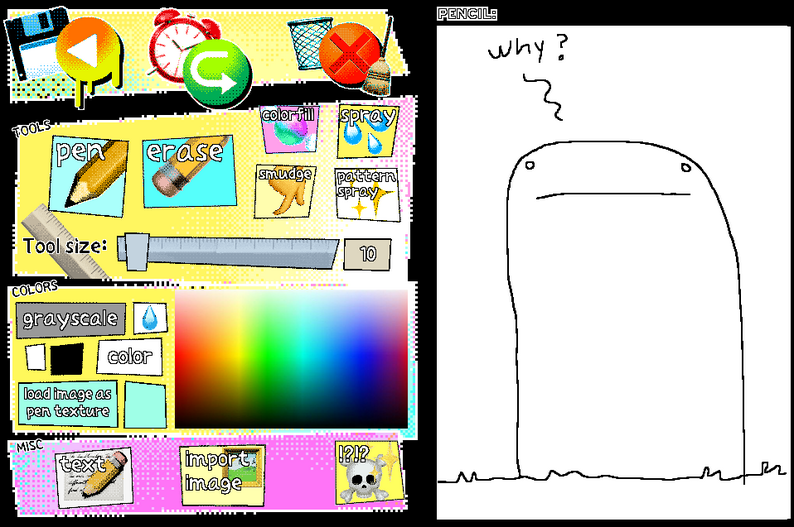
The first tool I wanted to talk about is Nathalie Lawhead’s Electric Zine Maker. It can be downloaded on itch.io. I’ve talked about Lawhead’s work on the blog before, because I am a big fan and enjoy Nathalie’s experimental art games and early internet aesthetic. I had tried to make glitched out art before using phone apps like the aptly named Glitch on Android, but the effects were always limited and I felt like having an application on my computer would give me more freedom.

Enter Electric Zine Maker. There are SO many tools inside this app, it blew my mind. The capacity for glitch art was practically endless. I also appreciated that the interface was not one of polish and gleam but rather had the same early internet aesthetic that Lawhead’s games had. It felt like the interface itself was talking to me, telling me that apps for artists can be FUN and that I shouldn’t take it or myself too seriously.

I felt the app also fit perfectly into the underground culture of zine making as well. Unlike art books with glossy paper that you might find in MoMa, zines are extremely personal and scrappy, often made by hand and scanned by one person for distribution. Lawhead captured the essence of that culture in the way the interface was laid out and the types of tools that are available. It gave me so much joy to play with the Electric Zine Maker, that I even want to make some zines now myself.

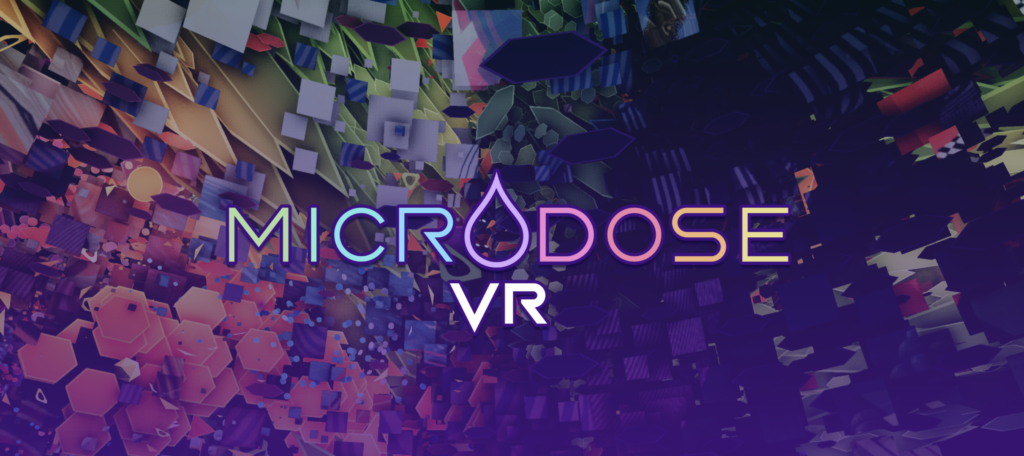
Microdose VR

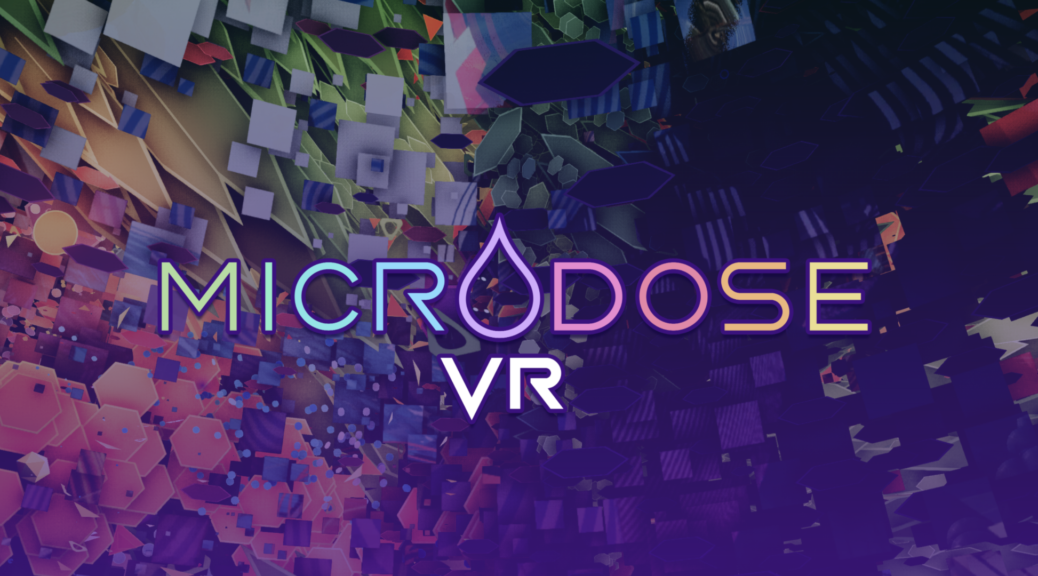
Unfortunately this tool is still in limited rollout so I was not able to download it myself but I can say with great confidence that it is extremely cool. Basically Microdose VR is an application that allows you to create psychedelic larger than life moving visuals in virtual reality. Its also designed to be paired with music and dancing for the ultimate rave experience. However, I think it can also be used in other contexts, from meditation and relaxation to self reflection.

I first discovered Microdose VR just a week ago when I tuned into a audiovisual live stream of a Bassnectar concert. I was stunned by the art and asked my friend who had linked me about it. Words cannot express my disappointment when I saw that I needed a seed code in order to actually download the software to start making art myself. Nevertheless, there was plenty of art to view on their Instagram account so I went and followed them there, and also joined their Discord channel.

Another thing that is special about Microdose VR is that it opens up the rave scene to people like me who are not very comfortable in large crowds. It turns the rave from something that has always been perceived as a shared experience into a personal experience. Honestly it’s one of the most delightful things I’ve seen come out of the VR world since I got my HTC Vive over a year ago. Of course I appreciate the 3D art tools like Tilt Brush but if my impression is correct, Microdose allows you to hit the ground running a lot faster with the ability to generate thousands of different moving textures, patterns, and shapes.

Of course I could end up eating my words if I download the tool and find out that the interface is terrible, but judging from the reaction of other artists it seems like they are doing a good job and responding to user feedback with rapid iteration.

Pose

Featured a few weeks ago on Product Hunt, Pose caught my eye because of its awesome demo video and its charming simplicity. There are a decent number of tools out there for drawing the human body with a digital model, but Pose pairs the process down to the essentials and makes it easy to move your figure around into any position you want. Even though it lacks the anatomical details of some competitors, Pose makes up for it with the ability to change other aspects.

You can make the shoulders of your figure farther apart, for example. You can make them taller or shorter. Also, the lack of anatomical detail makes Pose perfect for illustrators who want to make more stylized art. It might not be obvious for people who don’t make art very much, but even professional artists use references for their work to keep things realistic, and it can be difficult to find a figure in just the right pose for what you are trying to draw.

But Pose isn’t only useful for professional artists. It makes drawing the human form approachable to almost anyone. It can help beginner artists understand how the body moves and play around as they improve. I also can appreciate the affordable price point, because as we know artists aren’t exactly rolling in dough.

Obviously there are many other apps for artists out there that I didn’t talk about, but I felt these three were a good range to highlight the type of stuff that is out there. I’ve been grateful to have these tools to help me explore my creativity and get back into making art. I think more developers should make apps for artists like this because we so often overlook artists and creative folks, preferring to make tools for corporate America.

You might not make as much money, but I guarantee you will have more fun making apps for artists like this. There is still so much more space for experimentation and art making with technology that the sky is really the limit. You could also discover a whole world of creating that you didn’t even know existed. Especially for developers who have a creative side and come from artistic backgrounds, making tools like this is a great way to go back to your roots. Or maybe you will be like me and play with some of the tools that are already out there. Either way, its a ton of fun and I highly recommend it. Remember you can be creative and be in tech, they are not mutually exclusive. Don’t let your creative side die.

If you enjoyed this article, consider following me on Twitter @nadyaprimak or if you need more tips on breaking into the tech industry, you can read my book “Foot in the Door”.
Hydra Tutorial For Live Coding Visuals

In my last post I wrote about the first session of SpacyCloud’s Live Twitch stream from two weeks ago. The twitch stream was an all day event where the first half of the day consisted of a variety of workshops around creative coding topics, while the second half featured performances from various audio visualization artists and creative coders. Unfortunately I could not attend all the events, but I wanted to write in detail about both the Hydra event and P5JS event. You can read the P5JS post here. Now let’s dive into some live coding visuals!

The Hydra tutorial on SpacyCloud was taught by Zach Krall, a graduate student at Parsons School of Design with an impressive portfolio of projects. Though I had been experimenting with creative coding since college and knew about Processing, the language that P5JS was ported from, I had never heard of Hydra before. Just the fact that it was something new peaked my interest, but when I saw the home page for the Hydra-editor I was pretty much sold. Every time you load Hydra, a different visualization appears on the screen, with the code that wrote to make it overlaid on top. You can copy and paste the code, so in a way each new visualization is like its own mini tutorial.

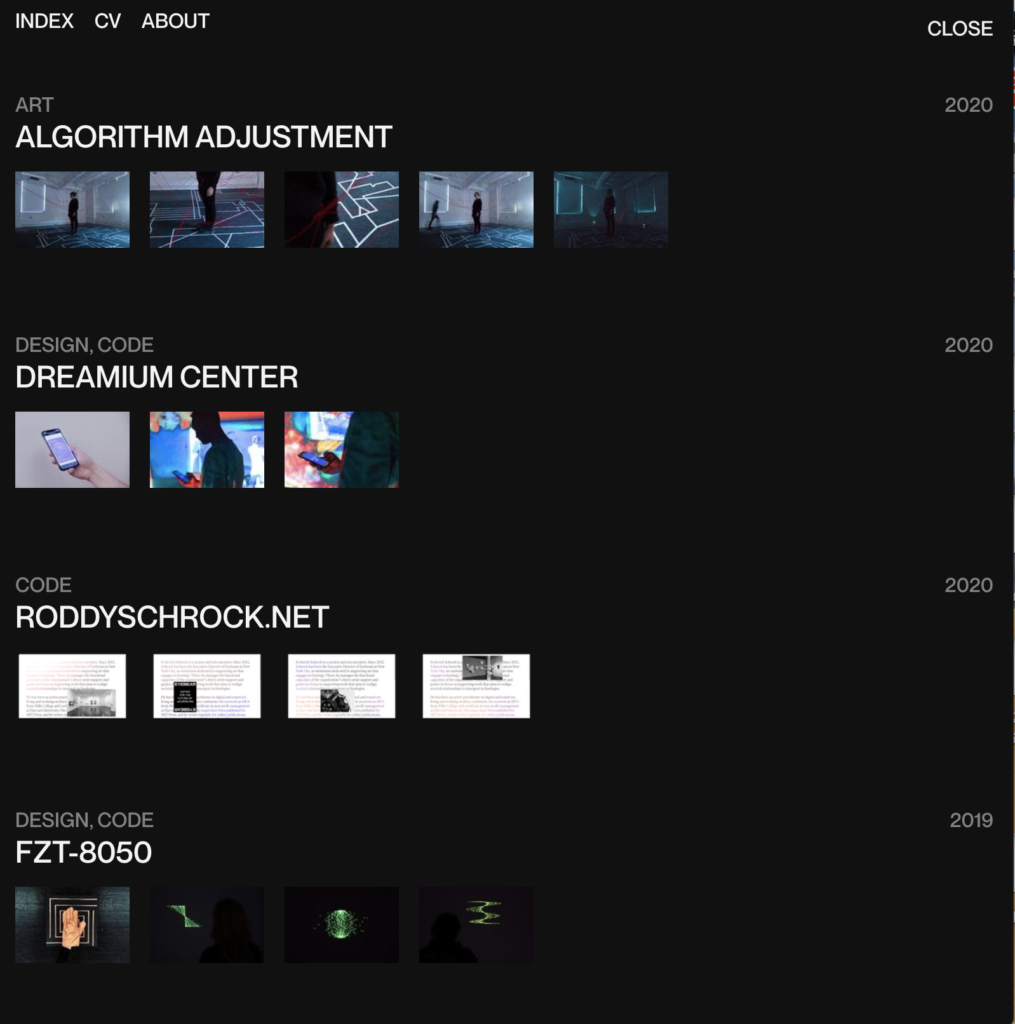
Zach Krall’s personal website

It turns out that all of the coding for Hydra happens in the browser, and the background of the entire browser window changes to display the product of your code. Personally I prefer this over the two panel system that most web coding editors use, because when it comes to visualizations you want to be able to see them in as large a display as possible. However I could see some people not liking this, because the code is a bit harder to read, even though it does have a background color applied.

Hydra was created by Olivia Jack who wanted to build a visualization engine that took its inspiration from analog televisions. It did that and a lot more, because with Hydra you can connect to other machines and each output your own video stream that can then be modified by others.

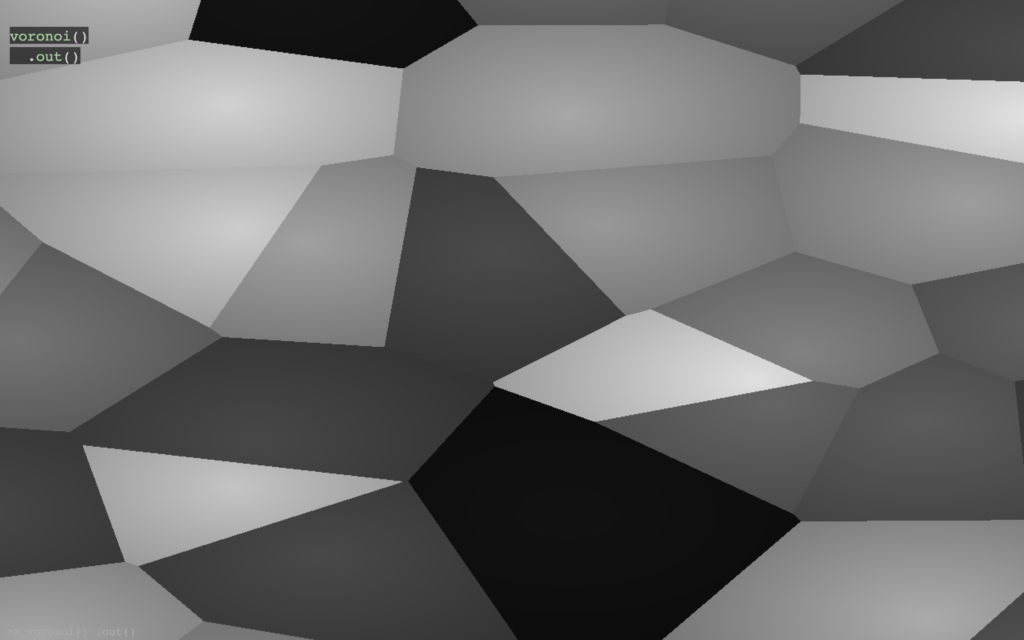
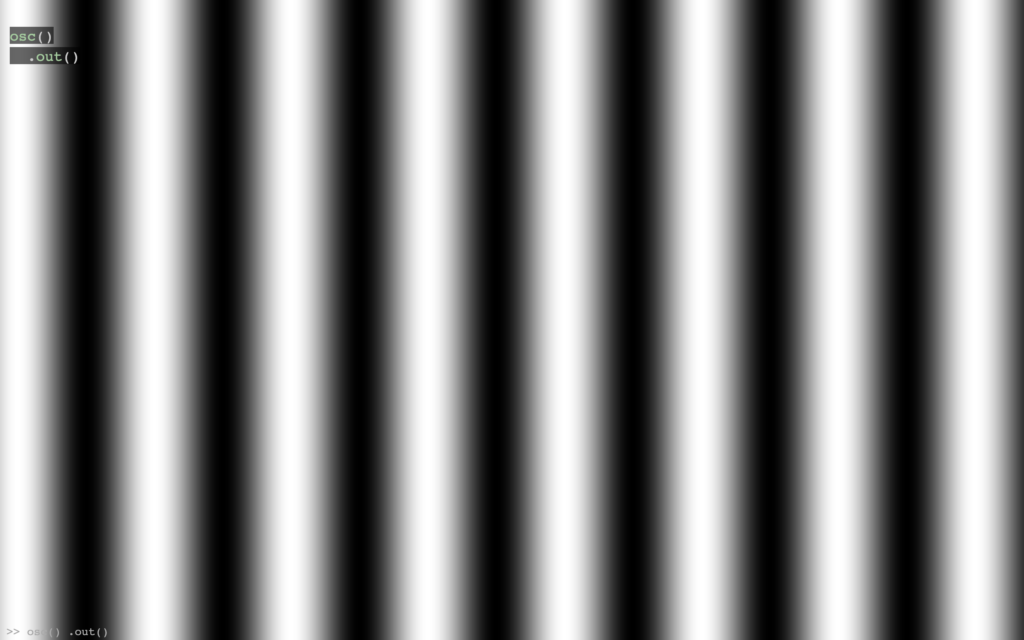
Probably the hardest thing about starting out with Hydra is wrapping your head around some of the paradigms, which are pretty different from your typical application. In Hydra, you typically start with a basic visual preset or texture, like noise, voronoi, or oscillation. Check out these basic visuals below. Note that while these screenshots are static, within Hydra all of these are moving visualizations.

A basic oscillation visualization is drawn to the browser with osc()
A basic voronoi visualization is drawn to the browser with voronoi()
A basic noise visualization is drawn to the browser with noise()

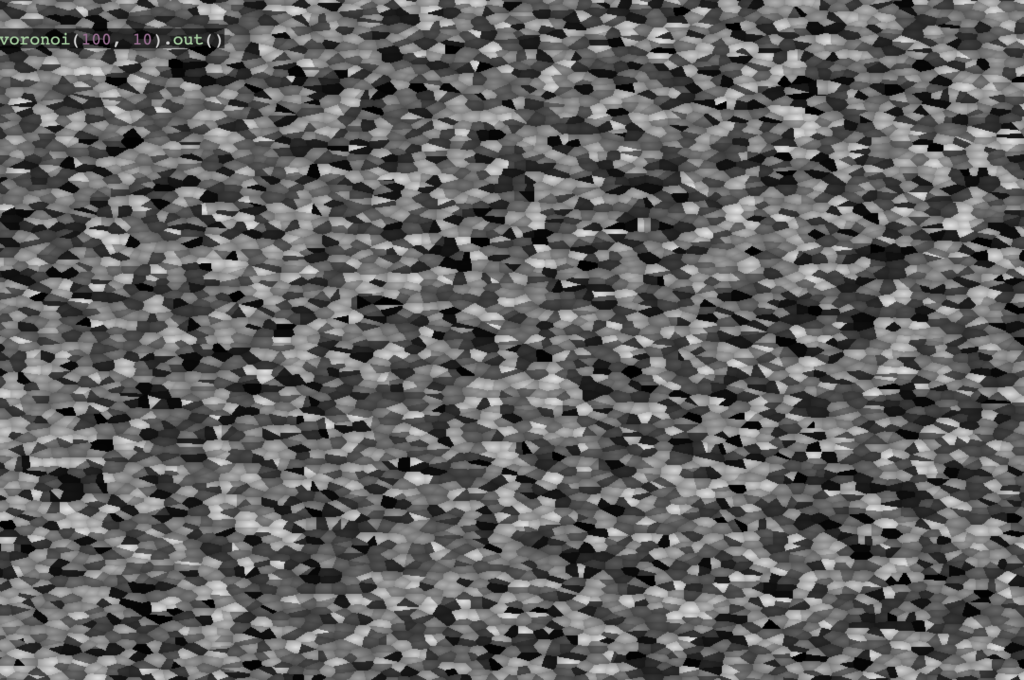
You can also pass values into the function to change it. For example, if I write noise(100) instead of just noise() the gray matter gets much smaller, like specks of dust rather than blobs. If you pass noise(100, 100) the specks of dust will start moving around the screen MUCH more quickly. The same can be said for voronoi and oscillation. First number defines the density of shapes, the second defines the speed of movement. Be careful passing in large numbers for the speed, it can be quite painful on the eyeballs.

In order to execute the code you need to hit Shift + Ctrl + Enter on the keyboard. You might have noticed the code inside the screenshots include a second function chained on called out() . This function is basically telling the browser to output everything in front of it in the chain. If you remove out() nothing will render to the browser and you will only see a black page.

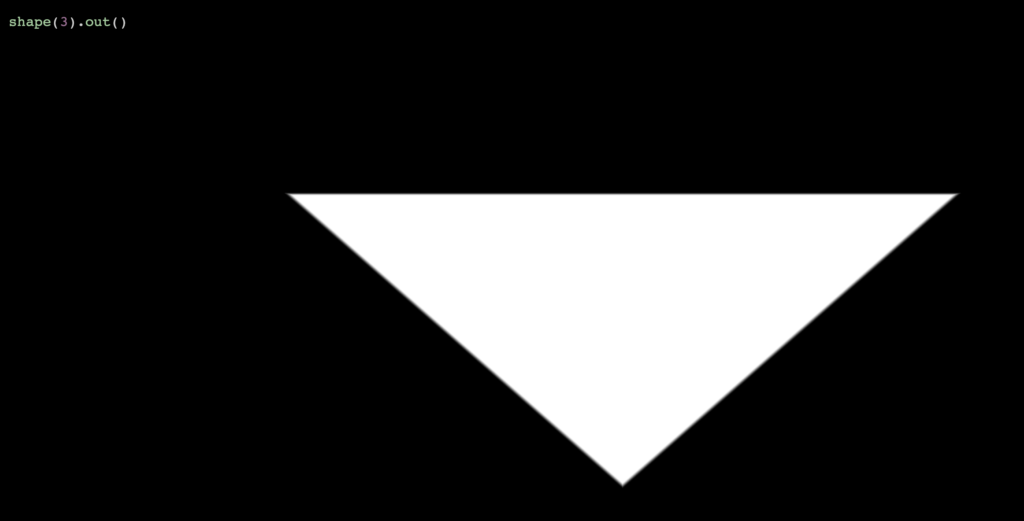
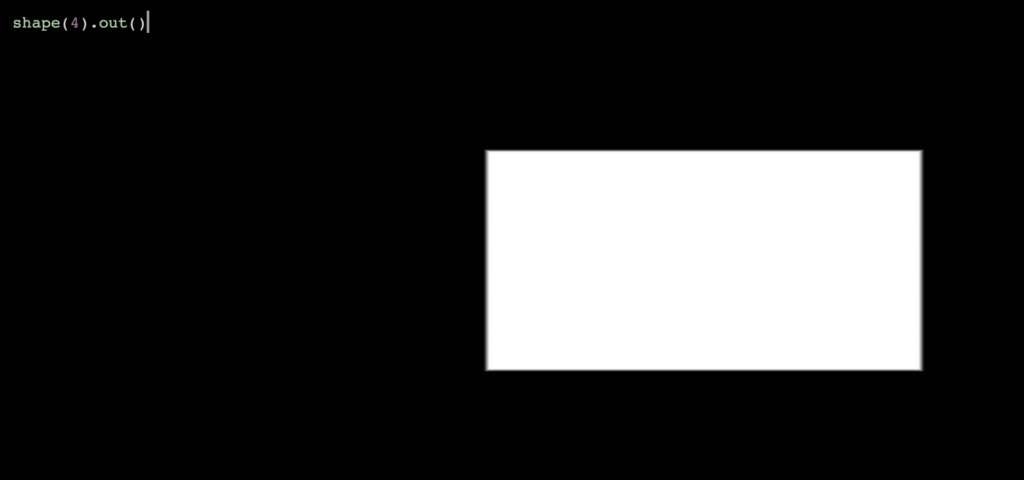
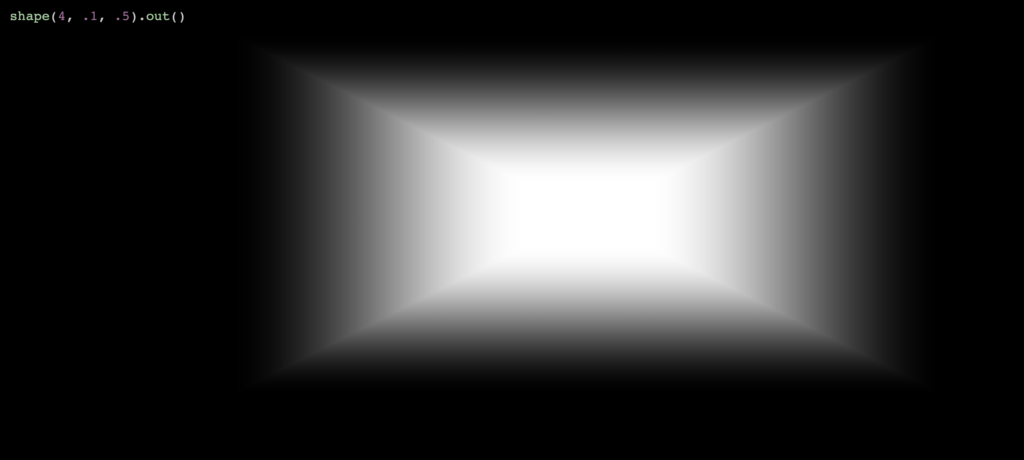
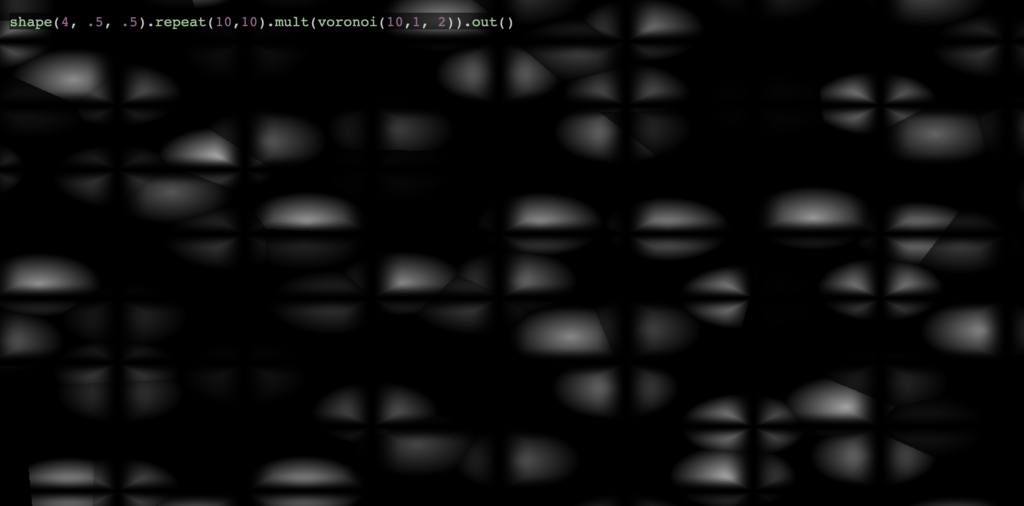
We’ve covered voronoi, noise, and oscillation. There’s one more basic render and that is shape(). Drawing a shape in Hydra is simple enough. The number you pass into the shape() function defines the number of sides for the polygon. So, shape(3) is a triangle while shape(4) is a rectangle, and so on.

You can also specify how large each shape is and how blurred its edges are by passing in 2 more numbers into the function.

You might be wondering, what could one possibly do with a simple shape in the middle of the screen? That is hardly interesting to look at. I also thought it was a little bit odd that you couldn’t place multiple shapes or define that border and size of the shape like you can do in most creative coding languages. However, I was pleasantly surprised after some experimenting, as hopefully you will be too.

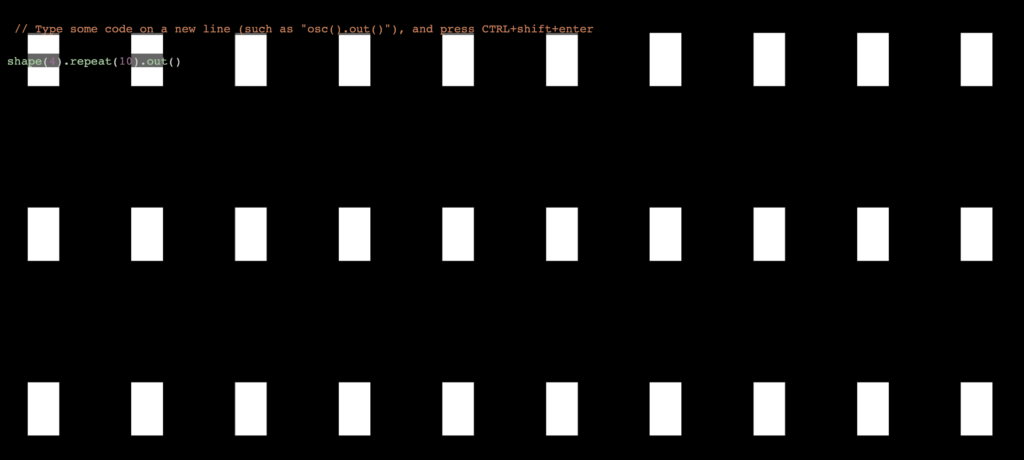
One of the easiest things to do is create a tile pattern with the shape. You can do this by chaining a repeat() function, where the numbers you pass into the function define how many times the shape is repeated.

If you write repeat(10,10) like in the screenshot above, you get the shape repeating ten times both in the vertical and horizontal directions. If you write repeat(10) then you will have the shape repeat ten times in the horizontal direction, but not vertical. This function is one of the geometry functions, which you can read more about in the documentation.

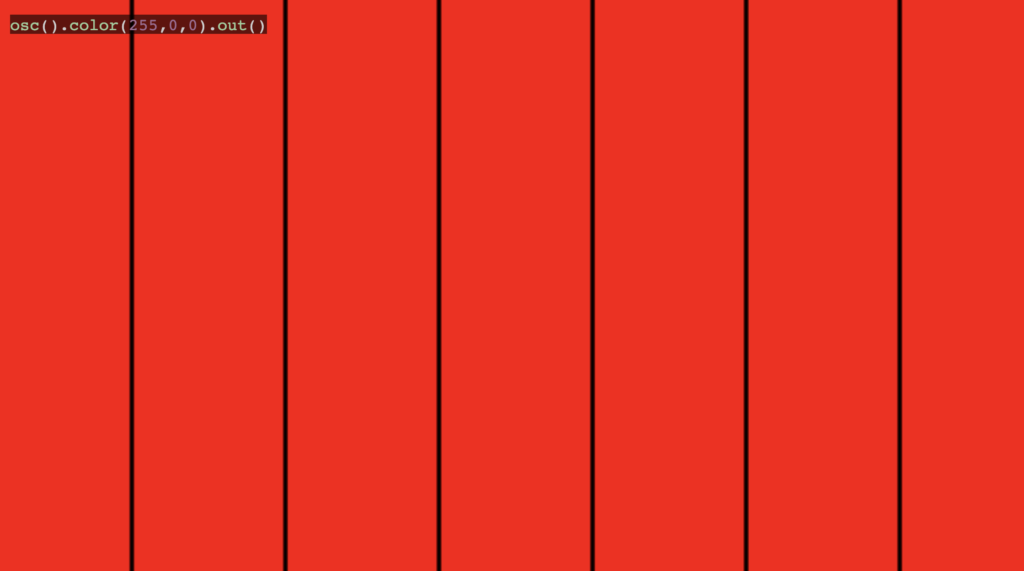
So how might you apply color to these shapes? If you were using voronoi, noise, or the other automatically generated textures, its very easy. You just chain a color() function where you pass 3 values corresponding to the amount of red, green, and blue.

A pure red oscillating texture

Because you cannot apply color directly to a shape, the workaround is to use a blending function with shape() and applying color within the blending function. For example, you can blend the red oscillator above with the rectangular tiles in the other screenshot.

Now you can see the rectangles are overlaid on top of the oscillating red texture. There are multiple blending functions, and each one has a different effect. I won’t go into detail on all of them because this post is getting lengthy and I am wary of the cognitive burden,

Suffice it to say there are 6 blending functions in total, called operators in the documentation. The other 5 are add, diff, layer, mask, and mult. If you’ve ever experimented with layer effects in Photoshop, some of these should sound familiar. Depending on the complexity of your visualization, these operators will sometimes output the same result. You are most likely to notice differences when using a range of color and texture.

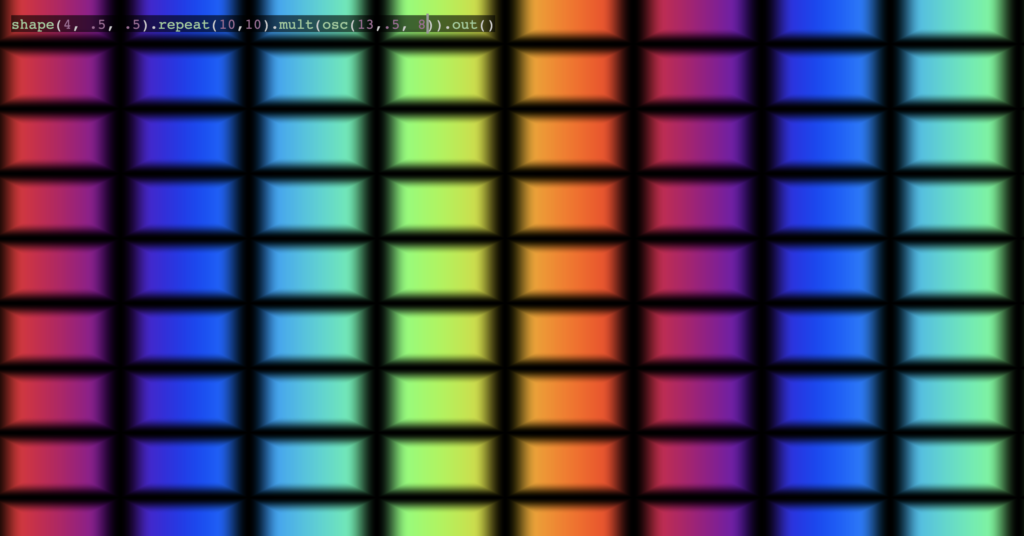
Let’s take the our oscillator and jazz it up a bit. Rather than using the color() function to apply a simple red color, you can actually pass 3 values into the osc() function directly. The first still specifies the number of oscillating rows, while the second specifies the speed they move across the screen, and the third specifies the range of color. Lets say we use the diff() operator and also tweak our rectangles by making them a bit larger and blurrier. What might that look like?

Now we’re cooking with gas. Just a few extra functions and things are much more interesting. There are many variables we can tweak to experiment even with this relatively simple visualization. For example, what happens if we change the oscillator to a voronoi or a noise generator?

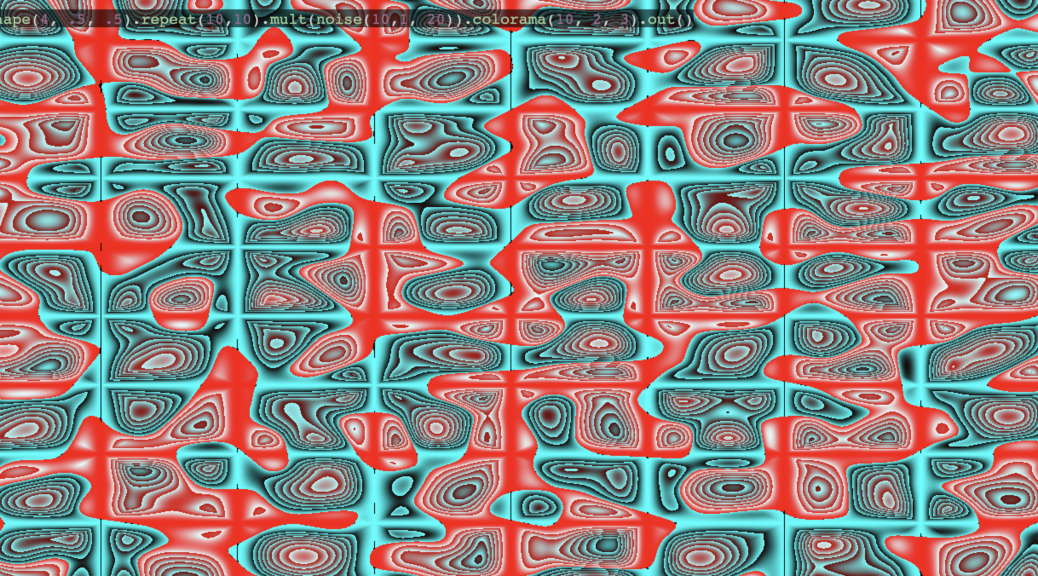
Alright, so it looks like we lost the cool colors but got a more interesting texture in return. Are there other ways to bring back color besides the ones I showed? Absolutely! The colorama() function which brings all sorts of psychedelic fun. It’s the last function I wanted to demonstrate because it can spice up pretty much any visualization, and is probably the quickest to get interesting results with.

live coding visual with shape function blended with colorama and voronoi

I hope by now you have the hydra-editor open in several tabs and have virtually lost interest in this post because you are too busy experimenting. Hydra is seriously one of the most absorbing and exciting creative coding tools I’ve had the pleasure of working with, and the goal of this post was to give you enough knowledge that you can hit the ground running.

Of course there is tons of material I couldn’t cover, and for that I want to leave you with a few references.

Hydra book is a very detailed guide that goes into pretty much every function Hydra has to offer, with lots of screenshots to help you along the way: https://naotohieda.com/blog/hydra-book/

Olivia Jack’s documentation is also nothing to shake a stick at, and has lots of coding examples that you can copy and paste to experiment with. There are also more Hydra tutorials listed here: https://github.com/ojack/hydra#Getting-Started

The Github repo includes a section with a whole list of resources which you can check out here: https://github.com/ojack/hydra/blob/master/examples/README.md

If its community you’re craving Hydra also has a facebook group with over 500 members: https://www.facebook.com/groups/1084288351771117

I hope you enjoyed getting your feet wet with live coding visuals. Good luck and happy creative coding!

If you enjoyed this article, consider following me on Twitter @nadyaprimak or if you need more tips on breaking into the tech industry, you can read my book “Foot in the Door”.

P5.js Tutorial for Beginners

I had the immense pleasure of attending several creative coding workshops on April 4th. They were streamed live on the SpacyCloud Twitch channel. There were additional sessions involving Hydra, Raspberry Pi, Haskell, and more. However for this post I want to focus on the first session which was a P5.js tutorial. In this post I hope to translate the P5.js tutorial for beginners into a written format, for posterity and to share what I learned. I’m going to review what was taught in the live session. Hopefully SpacyCloud will have another live stream in the future so I can catch up on what I missed. Here is the landing page for the event schedule.

Although I have used Processing years ago when I was in college, I knew I was very rusty which is why I decided to tune into Leandra T’s P5.js tutorial stream. Originally branded as a creative coding language for artists, Processing is mainly used to create generative art, visualizations, and immersive installations. P5.js is basically a version of Processing that is ported to Javascript. Processing was developed my MIT and is built on top of Python. Naturally people wanted to be able to show their generative art online, so it didn’t take long for there to be a huge demand for Processing that worked with Javascript instead of Python. Since P5.js has taken off there is tons of code online that people are sharing, making it a lot easier to learn.

That being said, it’s still nice to have someone walk through every step with you. That is what Leandra did. After showing us an example of what we were going to make, Leandra dived right into the online P5 editor. Whats great about this editor is you can do all of your coding online and see the results of your code side by side. She went over some of the basic functions, such as setting the canvas and background, and drawing shapes.

In the above code (to be more precise, a screenshot from the aforementioned P5 editor) you can see two functions, setup and draw. The setup function is called once when the application first runs, while draw is called constantly every frame (at least 24 times per second). What that means is that while it looks like the circle is static, it’s actually being redrawn constantly. However our eye cannot perceive that so it looks as though the circle is always there.

As you might have guessed, createCanvas is only called once and the two numbers you pass are the pixel width and height of the canvas, respectively. The canvas defines the area within which you can draw. Inside the draw function, background is what defines the background color of your canvas. If you pass 1 number, you will get a shade of gray as if you passed 3 RGB (red, green, blue) values. That means that background(220) is just shorthand for background(220,220,220). Each value can be as high as 255 (white) or as low as 0 (black).

Then of course you have the ellipse. In the screenshot above there are only 3 values passed to the ellipse function: x coordinate, y coordinate, and radius. However, you can actually pass in 4 values, which is why the function is called ellipse rather than circle. Passing in 4 values means you can stretch or squish the shape because you are passing the x coordinate, y coordinate, width, and height.

So far this is pretty boring. Luckily, it only takes a few tweaks for things to get a lot more interesting. Instead of passing the ellipse static values you can pass in things like mouseX, mouseY, or random. Passing in mouseX to the first value of ellipse and mouseY to the second value will make it so that you are essentially painting circles across the canvas wherever you move your mouse, because the ellipse will follow your cursor. If you pass random instead, the computer will generate a random number every frame and draw the ellipse to those coordinates.

You need to at least pass random a maximum number, so that it knows the range within which the random number can fall. If you want circles to cover the whole canvas, you can use random(width) for the x coordinate and random(height) for the y coordinate because P5.js stores the width and height of the canvas to those variables. Also make sure you move background out of the draw function and into setup, otherwise you will only ever see 1 circle on the canvas because the background will continuously be drawn on top of it.

What the canvas will resemble when you pass in random(width) and random(height)
Using mouseX and mouseY will be more like “painting” with the shape

Okay so now we’ve got lots of shapes on the canvas, but where is the COLOR?! Much like you can provide the background 3 values that reflect red, green, and blue you can do the same for shapes with the fill function. For example, if I pass fill(255, 0, 0) I will get a completely red circle like below.

But what if I pass random values instead? What do you think will happen?

Now we’re cooking with gas. Leandra went through similar steps in her live tutorial, to make sure everyone understood the basic principles and the most commonly used functions in P5.js. One of the most popular uses is to create visualizations that respond to sound. These are obviously a huge thing at raves and concerts, and they are easy and fun to make. The first step is to make sure you have the sound library linked in your P5.js editor.

On line 5 in the above screenshot there is a url pointing to p5.sound.min which is the P5.js sound library. If you click the little arrow above the code it expands to view the files that you see on the left hand side. Click on index.html and confirm that you also have the p5.sound.min script on line 5.

The next screenshot illustrates the additional code you will need in order to setup the mic and start receiving data from it that you can use for your visualization. Basically, you have to setup some variables at the top so that you can access your mic anywhere in the code. The variables start off empty but then you pass the actual mic in your setup function and start it so that it actually runs. Finally, you need to get useful data from the mic so you call getLevel to get the loudness which you can use for visualizations. You can confirm that the mic is working by adding a console.log statement so you should see values being returned below your code when you run it.

I know that my mic is working because I am seeing values in my console at the bottom

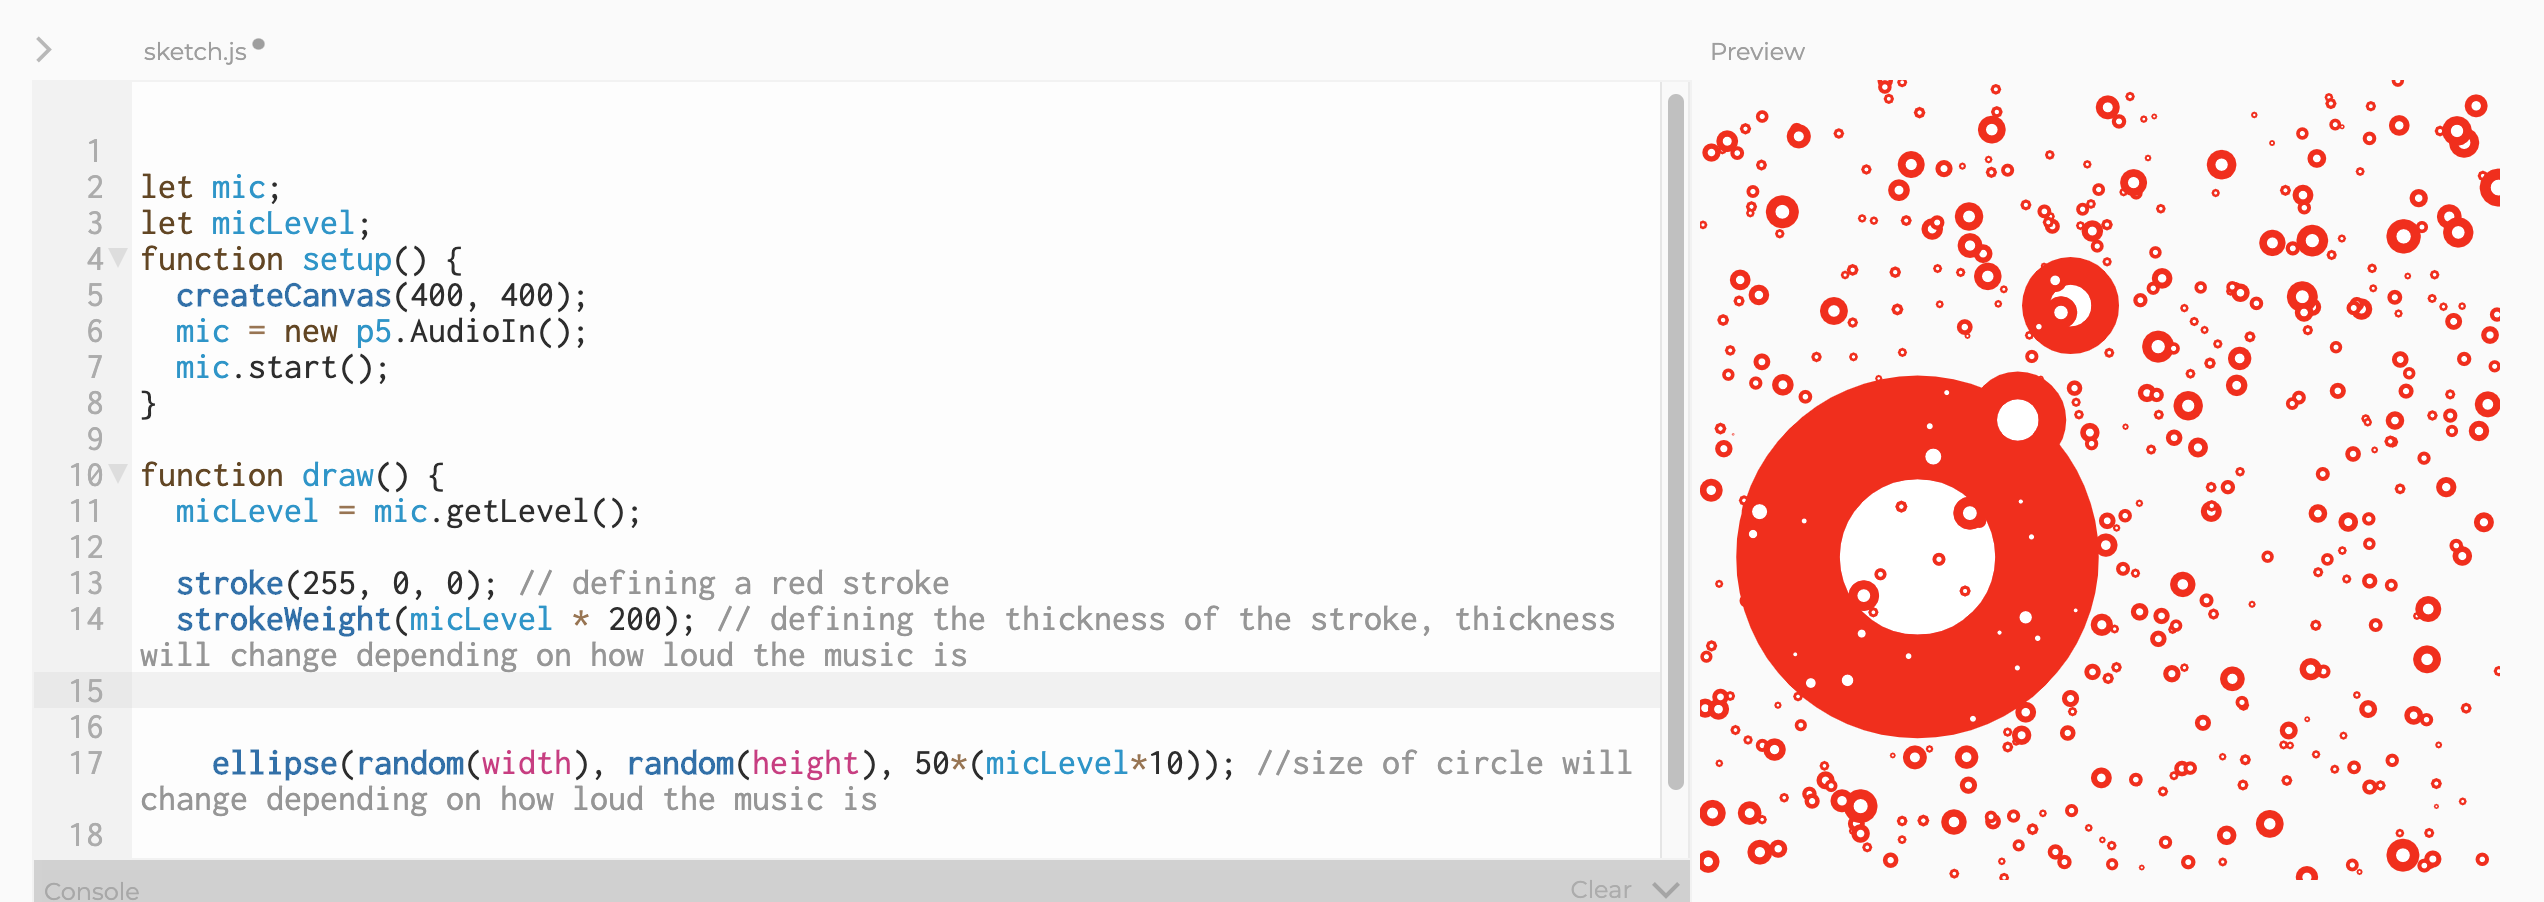
We’re getting really close now. Only a few more steps to go before the finish line. Now that you know your mic is working, you can try passing in the micLevel and playing some music to see how the visualization responds. You can also introduce a few more functions, such as stroke and strokeWidth. The role of stroke is to define the color of the border of your shapes. Like fill, you pass in 3 values for red, green, and blue. On the other hand, strokeWidth is for defining the thickness of the border. You can see an example below integrated with micLevel for some cool effects.

We’re at the final step. It’s going to involve a slightly more complicated programming concept, so bear with me. This concept is called loops, and in particular we are going to use a for loop. Basically you define a variable, like num, and that variable can increase or decrease until you reach a specified stopping point. Most of the time, for loops are used to count upwards by 1 to a designated end point. So a for loop like for(let num=1; num <= 8; num++) { console.log(num) } will output 12345678. Hopefully that makes sense. There is plenty of reading online about for loops if you are still confused.

Unfortunately it doesn’t look that cool in a screenshot. It will look much cooler for you when you actually have the code in P5.js yourself and play some jams! So first, let me put the code here so you can actually copy and paste instead of manually typing everything out. This was the exact code that was written in the original P5.js tutorial.

let mic;
let micLevel;
function setup() {
  createCanvas(400, 400);
  mic = new p5.AudioIn();
  mic.start();
}

function draw() {
  micLevel = mic.getLevel();
  background(5);
  
  stroke(255, round(micLevel * 800), round(micLevel*255));
  strokeWeight(micLevel * 200);

  
  for(let i =0; i < 6; i++) { // for loop counting from 0 to 6 
    fill(random(250), random(100), random(255), 255); //1 circle is drawn with every loop, so 6 circles total
    
    ellipse(i*60 + 40, micLevel*5000 + random(50), 50); //micLevel for the y value caues the circles to go up and down with the volume, i*60 means a new circle is drawn every 60 pixels along the x axis
  }
 
}

I also tweeted out a video of my own code and music so if you don’t feel like it or don’t have time right now to tinker with the code here is a short video. Make sure you turn the sound on!

https://twitter.com/nadyaprimak/status/1246484591004745728

Hope you enjoyed this P5.js tutorial. Stay tuned for another retrospective on SpacyCloud live workshop about the hydra-editor!

If you enjoyed this article, consider following me on Twitter @nadyaprimak or if you need more tips on breaking into the tech industry, you can read my book “Foot in the Door”.
What it Means to be a Creative Coder

Programmers rarely agree on whether or not coding is a creative profession. My interest in coding always stemmed from what I could create with the code. Seeing an interesting visual result from my efforts is usually the most satisfying part. Most programmers are less concerned with how their app looks and more concerned with the functionality. Usually, as long as the app works the way it is supposed to, most programmers are satisfied.

Of course that is an overly simplified model. Programmers often care about how the code is written, whether it is reusable and easy to understand for other programmers. One could argue that deciding on which tools to use and how to organize the different parts of the code involve creativity as well. Creativity is a broad term and I’m not here to make a commentary about whether or not programming is creative. This post is rather about people who identify with the term creative coder. Namely, folks who got into coding because they are interested in how they can express themselves creatively with technology.

A beautiful procedural artwork made with Processing by Pierre Marzin. View the original and code here.

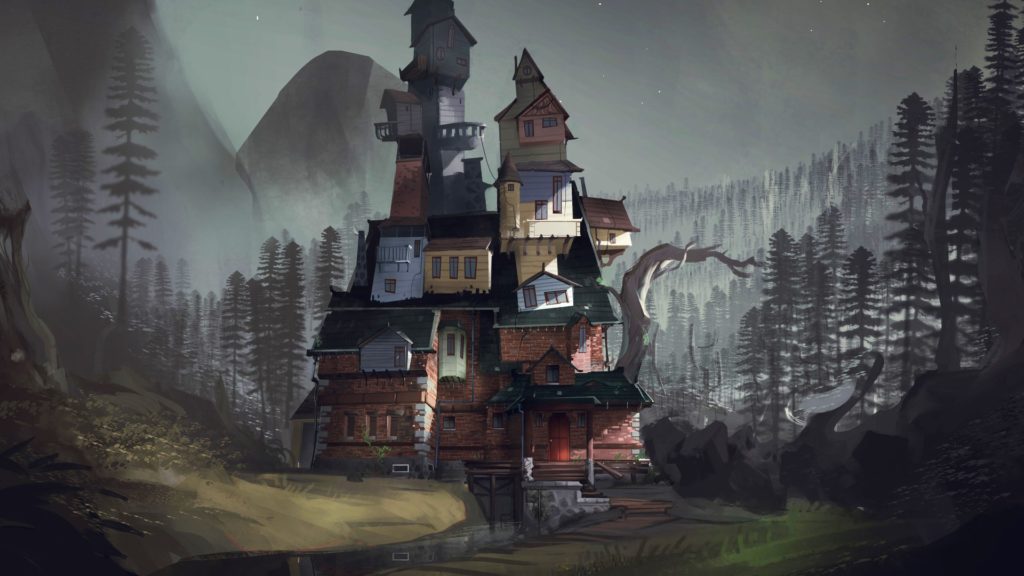
There are a lot of good examples of creative coders in some of my other blog posts, here and here. Nathalie Lawhead is one of my personal favorite creative coders. Their work lies at the intersection between games and interactive art. They draws a lot of their inspiration from old flash games and early net art. Games like What Remains of Edith Finch, which are sometimes called “walking simulators” by the gamer community for being primarily focused on storytelling can also fall into the category of creative coding.

Then there are folks who make all kind of interesting art with code on communities like Codepen. From unique loading screens to animated menus to scrolling backgrounds, these are also inherently creative. It’s hard to make a list of every kind creative coding out there because technology is constantly evolving. Tools like Processing and OpenFrameworks allow for especially dynamic and immersive art to be created, from moving and morphing fractals to particles replicating the flocking of birds or cell division, the sky is the limit for what kind of art creative coders can make.

I am a lot more passionate about programming when I am working on something like a game or interactive art project versus enterprise software. Tackling technical challenges can be fun occasionally but I am much more interested in the act of creation and the product I am creating. I am especially excited if the product I am making involves other creative aspects.

The house that you explore in the game What Remains of Edith Finch.

I think that is what differentiates creative coders from other types. What made them interested in coding was not the technical challenges or the logic puzzles but the excitement of creating something that is immersive and captivating. Creative coders may or may not be software engineers in their day job. Some are front end developers, fewer are back end developers. For me UI developer was especially attractive as a day job because it merges design and development. Even in these jobs, though, as I write about in another post, sometimes there is not as much creative expression as one might hope for.

That is the other thing that distinguishes creative coders. They always have that powerful longing for creative expression. Creative coders might also enjoy other things like drawing or music or writing. Personally I enjoy all of these things, and didn’t do any programming of my own for many years. Technically, I did tinker with web development in middle school but my first object-oriented programming code wasn’t written until college.

An astonishingly detailed artwork made purely with CSS by Ben Evans. View the original and code here.

Some creative coders have never even worked for a corporation in their lives. For instance, there are artists who started collaborating with technologists years into their career and discovered a new passion they didn’t know existed. They might have learned to code in their 30’s and used it to create generative art or experimental experiences. Frameworks like Processing have made coding a lot more approachable even for artists and folks who have traditionally felt ostracized from the world of code.

Unfortunately, being a creative coder can put you in a weird limbo between the world of programmers and the world of artists. I felt this very acutely in my career, as someone who graduated with a Visual Arts degree and then began working as a software developer.

Abstract art made with Processing by Takawo. See the original and code here.

On the programming side, there is still a lot of gatekeeping, especially at the corporate level that makes creative coders feel unwelcome and unwanted. Programming interviews are often designed to test your knowledge of algorithms that are typically taught in computer science classes. Unfortunately, since creative coders often come from non traditional backgrounds the chances that they are familiar with these algorithms is pretty small.

There are also negative stereotypes among some programmers about creative folks specifically that will put them at a disadvantage as well. Some programmers out there believe that you are either a logical person or a creative person, basically concluding if you are good at art you cannot write code and vice versa. Obviously, this is ridiculous, but those who believe it can be hard to persuade.

Particle generation made with Open Frameworks by Julian Vidal.

Sadly, these gatekeepers sometimes succeed in convincing people and so some of them never even try to experiment with coding. These same gatekeepers are usually also the kind that make it harder for folks minorities in tech to have their accomplishments recognized. Usually this means if you’re a minority and identify as a creative coder, the path to recognition and respect can be even steeper.

As if it wasn’t bad enough that gatekeepers in the programming world tend to look down on creative coders, there is a similar issue for these coders being recognized by the art community. First of all, the percentage of galleries that showcase generative art, immersive experiences, or experimental games is still very low compared to the galleries that showcase works of painting or sculpture. The few galleries that do, like Artechouse, can be extremely particular about who they choose to showcase. To be chosen for exhibition is akin to winning the lottery, probably even more difficult than landing a programming job at Google or Facebook.

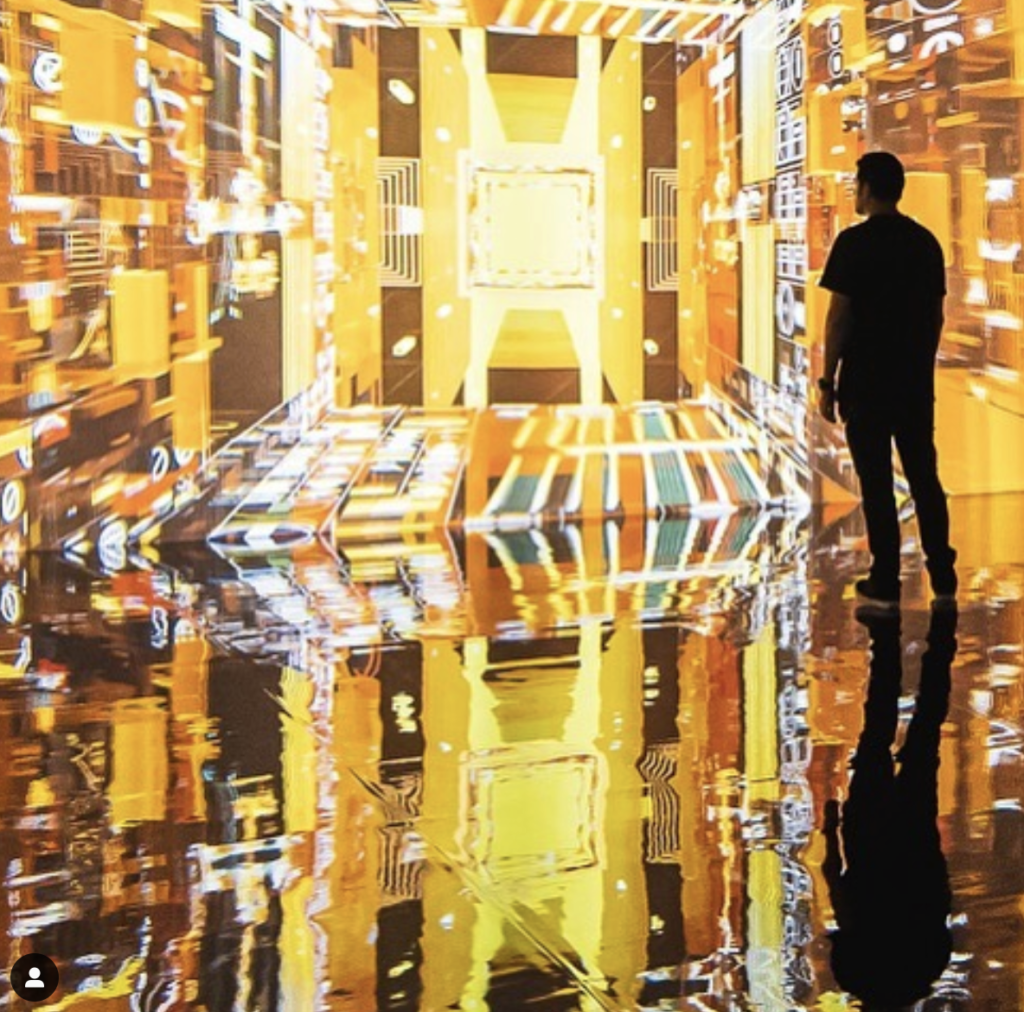
One of the Miami exhibits at Artechouse from their Instagram page.

If you identify as a creative coder, you might be feeling a bit depressed after reading all of this. The thing is that regardless of how much gatekeeping or frustration creative coders face, they make some of the coolest projects on the internet. Once you make that first hypnotic generative art piece or that game that you’ve had in your head since you were 10, you won’t feel the same afterward. Ultimately, if you are a creative coder you know it’s so much fun that you would be doing it regardless.

Cover image by Masaki Yamabe


If you enjoyed this article, consider following me on Twitter @nadyaprimak or if you need more tips on breaking into the tech industry, you can read my book “Foot in the Door”.

How to Become a UI Developer

After sharing my post describing what a UI Developer is, I got some requests to write another post specifically about how to get a UI Developer job. It’s certainly not an obvious path. My first job out of college was working for my alma mater in the Art Department media lab, during which time all I knew was that I wanted to transition into web development.

UI development is a mixture of design and programming, which is a pretty good option for a creative coder. When I first got interested in programming I didn’t know positions like “UI Developer” even existed. After that I had a few short term positions where I was focused on just getting my foot in the door. I had some free time and decided to look into various types of UX design courses. I already had a degree in Visual Arts from college, so I thought maybe if I ended up hating being a programmer, UX design would be a good alternative At the time I didn’t know what working in the tech industry would really look like, so I didn’t want to put all my eggs in one basket.

I ended up settling on an Interaction Design certificate offered by UC San Diego through Coursera. It was a series of six courses that taught you how to run A/B tests with different designs, how to conduct research and interviews to figure out the sort of problems users are facing, and how to use tools to speed up the design and testing process. 

Here is a screenshot for the homepage of the Interaction Design Specialization I enrolled in.

The final course was a capstone project where students had to actually put into practice everything they had learned and create a high fidelity mock-up for a mobile app. What the app was and the problem it solved was completely up to the student. It took me a year to complete the series of courses since by that point I had landed my first software engineering job. It’s hard to say how much of a difference the certificate made in terms of landing my first UI Developer role later on. If I had to guess I would say it was equal parts my Visual Design degree and the certification.

Here are some of the high fidelity mockups I made in my capstone class.

The Interaction Design certification helped me gain more confidence and allowed me to add a significant design project to my portfolio. However, it’s hard to say how much my Visual Arts degree played into the employers decision to hire my for my first UI Developer role . The reason why I say that is because frankly, most software developers do not come from creative backgrounds. I knew at this point that I had a solid foundation in software engineering because I had worked for 8 months at a startup using Angular. That made my art degree like the icing on the cake, and the certification kind of like the cherry on top.

When my husband got admitted into law school in DC, I applied on a whim to a Data Visualization Developer position and got the job without even needing to fly there. While on the surface the title of Data Visualization Developer doesn’t sound like it necessarily involves user interface design, you could tell by reading the job description that it did. Basically the company wanted someone who could draw mock ups for widgets inside of a data visualization application and do research on how they might work best, while also actually developing the widgets and doing other front end work. 

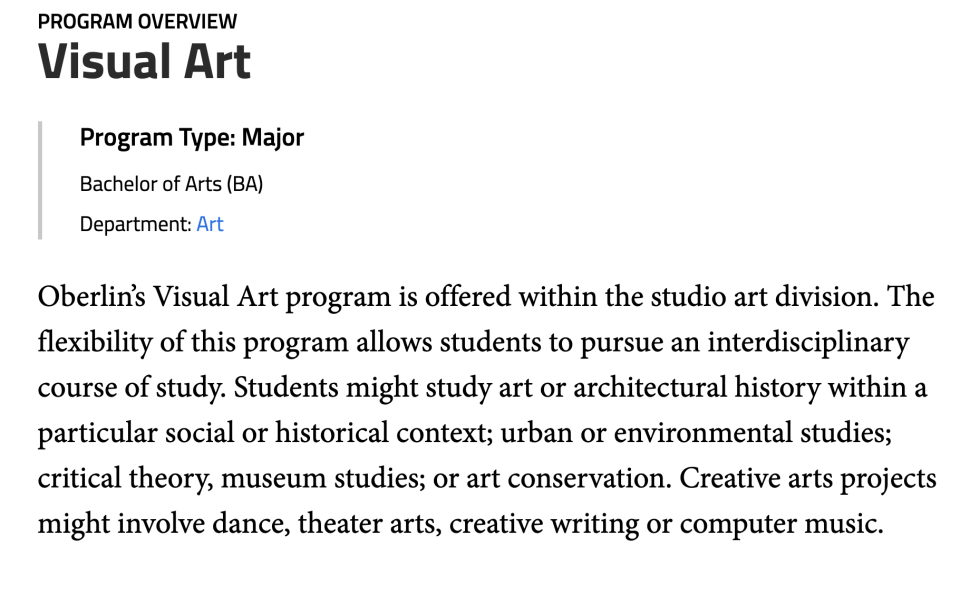
I went to college in Oberlin, Ohio. This is a description of my major.

That particular position did not give me any sort of UX assessment as part of the interview process, though they did ask about my certification and Visual Arts degree. Unlike standard software engineering positions where you can usually expect a coding test of some sort, UI Developer positions have a wide range of tests. Sometimes they will give you a mock up of a website and ask you to code it. Other times they might ask you how you would go about creating an application for a specific purpose, or what you might do to improve the design of an existing application. They might even have you sketch out interfaces on a white board.

One position I applied for gave me a simple form with a poor user interface and asked me to code a new version that would be better. In this case I misunderstood the instructions and ended up not getting the job. I thought that I wasn’t supposed to touch the code that was already there and that it would be breaking the rules, but in order to change the form input (which was what made the UI terrible) that was a necessity. That is the other tricky part about UI developer positions. It’s easier to misunderstand the instructions if you are given a test that you’ve never had before, or that breaks the paradigm of what you would expect.

!EMPTY!

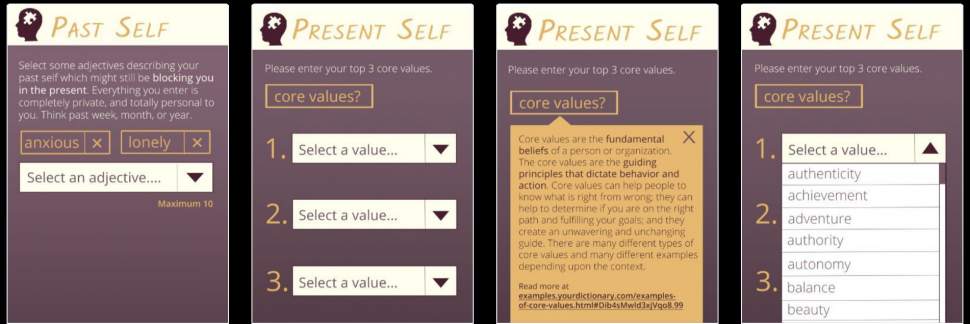
One of my earlier hand drawn wireframes for my app about finding yourself.

It also makes it more difficult to give concrete advice on how to pass a UI Developer interview. If you have any doubts at all, it is best to ask. You might get asked about any education you have in the past, or any portfolio pieces that involve user experience design. You might also get asked to demonstrate your coding skills whether through an online test or something more akin to a standard software engineering interview.

Honestly I wouldn’t be surprised if some jobs hand out a take home test where the interviewee must redesign and code a landing page or something of the like. One UI position I interviewed for actually had me sketch out wire-frames on the white board, live code some CSS, fill out a pen and paper test with programming questions, and solve additional programming problems on the white board with another developer. There was no way I could have predicted what all the assessments would be ahead of time.

The only way to really start getting comfortable with the process is to apply to some jobs and see if you can get any interviews. Depending on how much user experience design skills the job actually requires, you might not even be asked to prove those skills at all. The hiring manager might be satisfied with any past design education and ask a few simple questions, and that could be it.

Oftentimes I have found that UI Developer positions still care more about the software development technical skills than design skills. It is another thing to keep in mind if you are more interested in getting UX experience or don’t want to spend more than a few hours a day coding. Make sure you read the job description carefully, and also ask lots of questions in the interview about what your day to day work will look like. I would hate for anyone to end up in a job they hate because the title said UI Developer but in reality they only get one design assignment per month and the rest of their time is spent on awful legacy code.

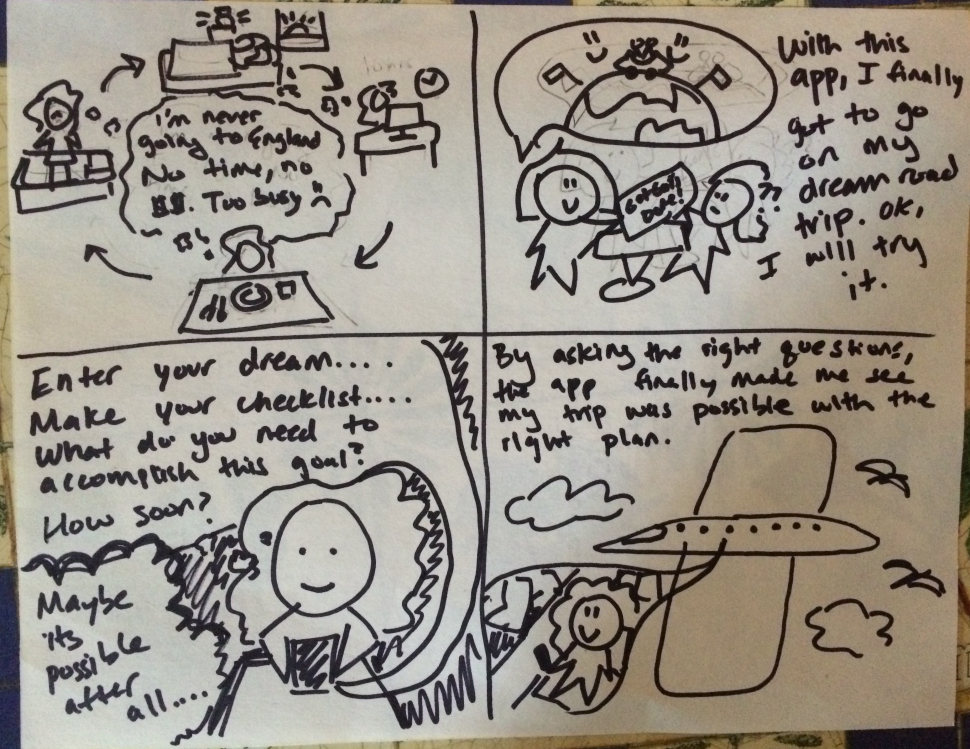
Another assignment from my capstone, where I had to draw a storyboard demonstrating the problem my app would solve.

Another frustration that is common among UI Developers is that they get hired in companies that don’t have a lot of design resources. That might mean you are the only design advocate in your organization, and it is easy to have your voice drowned out. Being assertive is oftentimes required or else you might get frustrated very quickly having to execute poor user interfaces and feeling bitter at your coworkers.

With those warnings aside, I still recommend considering UI Developer positions if you are the type of person who enjoys both coding and design and like to interface with people on both sides. Make a portfolio website, show off some UX and coding projects, and try to land some interviews! I wish you the best of luck.

If you enjoyed this article, consider following me on Twitter @nadyaprimak or if you need more tips on breaking into the tech industry, you can read my book “Foot in the Door”.
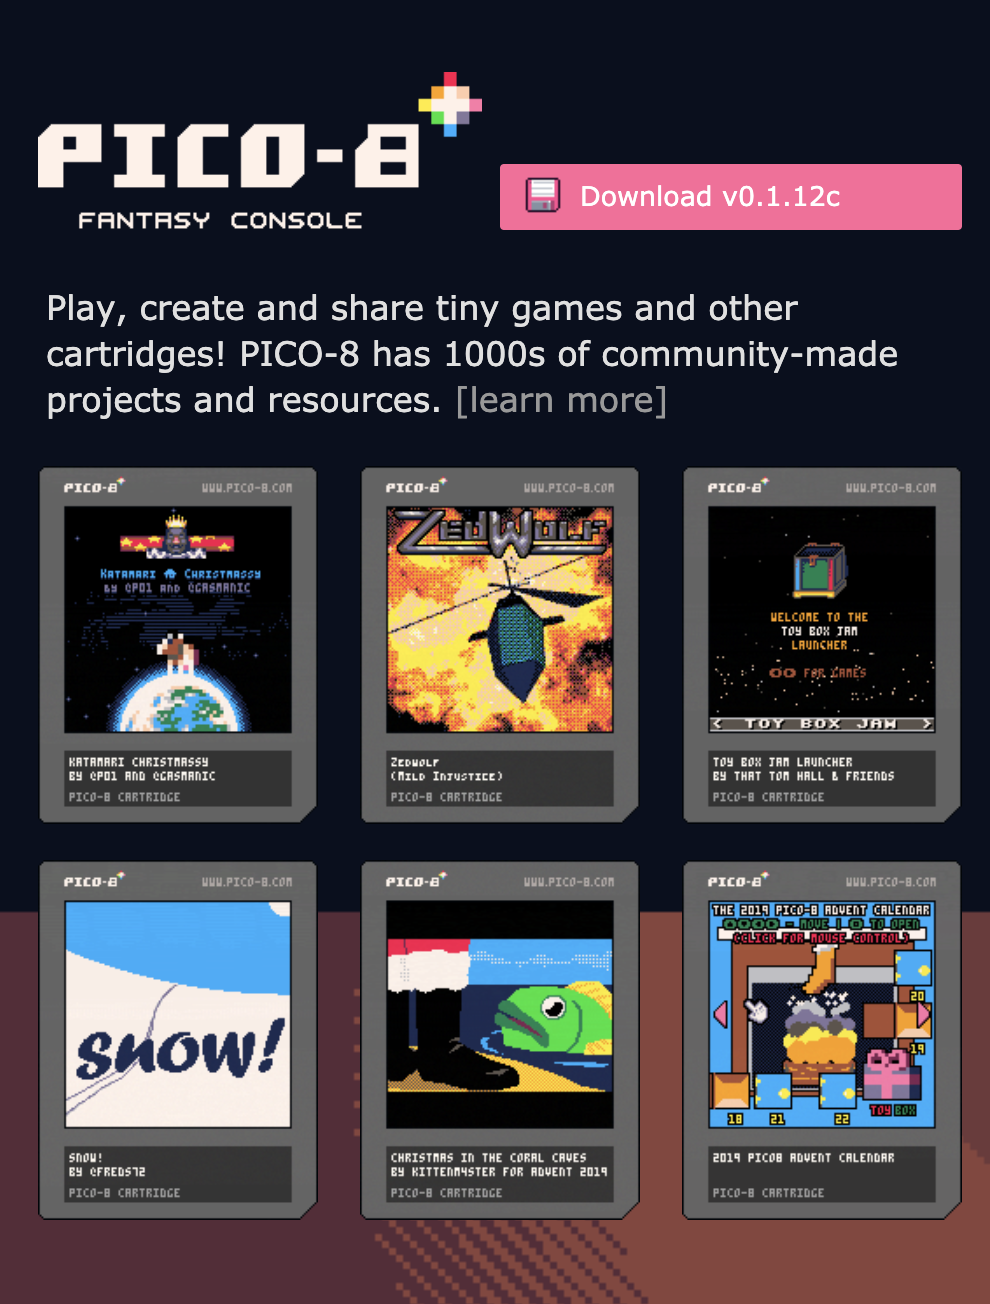
Making Games to Learn Programming with Pico-8

There are a lot of reasons to start making games to learn programming. Games are fun. They are the epitome of creative coding. Unlike to-do apps, games are something you are excited to show to your friend because it is something they will engage with. There is a misconception among some developers that games are difficult to code, and unapproachable to beginner developers. It’s also a great first language in coding for gamers.

I didn’t really get excited about learning to code until I started making games. As a creative coder, games have always been by far the most interesting to me. It’s quite possible I never would have become a software engineer if game development wasn’t one of the applications. As a kid games like Rayman, Zelda, and Donkey Kong filled me with excitement. I remember a feeling of joy when I finished a level or beat a boss that I wanted to shout it from the rooftops. With Pico-8, you will programming simple games, but some of them might remind you of those games from your childhood.

The fact that I have the skills to build games like that myself as an adult fills me with pride. That is because I know the kid I was before would have looked at the adult me with awe. Of course some days I forget about that when I am struggling with a frustrating bug. But at the end of the day it is the main reason I do what I do. We all have an inner child who we want to satisfy, after all.

It is possible today to learn all of the major programming concepts through making games. Although I did not do that myself, I think it would have made my experience much more engaging. My first real foray into programming was in college where I took a few programming classes, and some days it was a real drag.

Pico-8: The Perfect Platform

A year ago a friend showed me a game engine called Pico-8 for making minimalist pixel art games. I initially rolled my eyes at it, because I thought myself sophisticated making games in Unity. I thought that making games with Pico-8 was like advertising to the world that you don’t know what you are doing. Now I couldn’t disagree more.

Every Game is a Pico-8 Tutorial

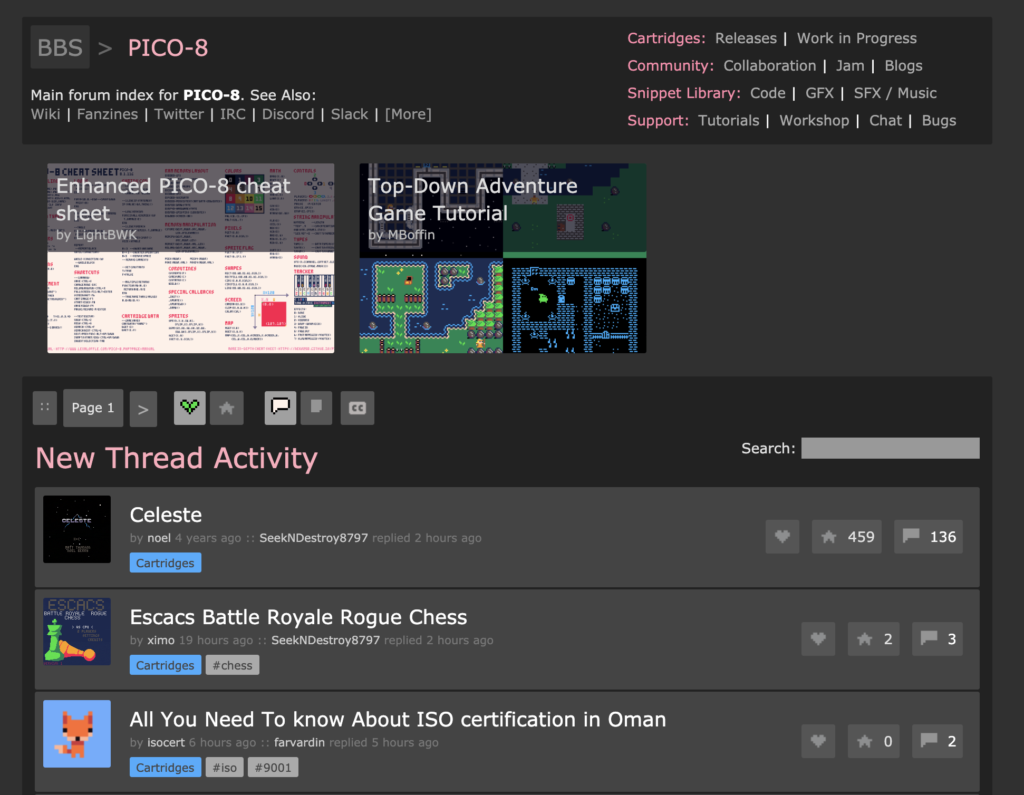
The first thing that is amazing about Pico-8 is the community. Every one is passionate about learning and sharing, and many members of the community make their own Pico-8 tutorial (s). There is such an incredibly giving and supportive network of folks who participate in the forums. They are also active on Twitter and Discord and beyond. In fact, some users even post Pico-8 code snippets as tweets!

The pico-8 forums are a goldmine

Many software developers believe in open source and sharing their code on GitHub. But in the game development world it’s not so easy to get access to raw code. The AAA world obviously has every line of code concealed behind 10 page NDA agreements. Indie game developers tend to be cautious and perhaps paranoid about people stealing their game.

Thankfully, on Pico-8 that could not be farther from the truth. Every game uploaded to the website allows you to view the code right in the browser, right below the game window. You can copy and paste it right into your own game, no strings attached. That is another reason that makes Pico-8 an exceptionally good option for making games to learn programming.

Simple Coding Language

Pico-8 runs on an easy to understand programming language called Lua. If you’re looking for a Pico-8 tutorial, there are plenty to choose from. In many ways it resembles Python and doesn’t require and pesky semicolons or parentheses all over the place. It reads a lot more like English than a lot of other programming languages do.

Pico-8 also has limitations on the complexity of the logic in the game, which it counts with “tokens.” This forces people to simplify their games and keep the scope reasonable. That is great for beginning programmers. It helps to avoid temptation to code something the long way instead of looking for a solution with fewer lines of code.

Documentation and Tutorials

Programming languages, frameworks, and API’s live and die by their documentation. The quality of the documentation often goes hand in hand with the quality of the community. Since I already wrote about the community, you can probably guess what I will say next.

Just one of the many fanzines you can get on itch.io

I bought a zine on itch.io which breaks down Pico-8 into its different parts. From explaining the user interface walking you through steps to build basic games, it covers a lot of ground. It’s the type of documentation which is not only thorough, but very beginner friendly.

Great Games

You might have similar thoughts to mine when you glance at your first few games on the Pico-8 platform. Certainly they aren’t going to blow you away with their graphics the way that some Unreal Engine games do. But believe it or not, there are some real gems and even best seller games that were made with Pico-8.

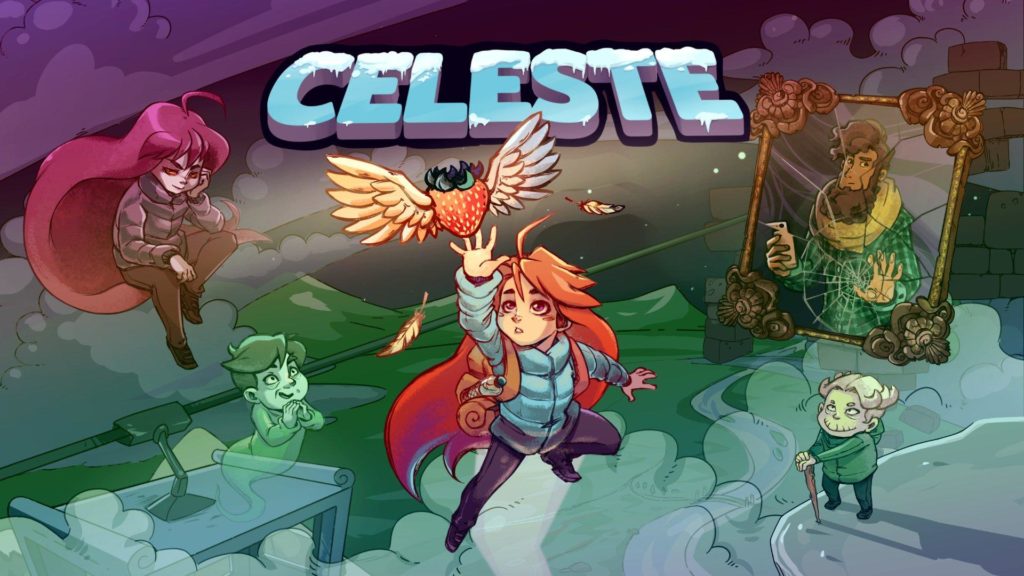
The most notable example is Celeste, a critically acclaimed platformer where the original prototype was built with Pico-8 in just four days. Beginning programmers should not expect to make a bestselling game. But it is encouraging to know Pico-8 is a platform where that is possible.

If you enjoyed this article, consider following me on Twitter @nadyaprimak or if you need more tips on breaking into the tech industry, you can read my book “Foot in the Door”.
If Da Vinci Lived in the 21st Century

Apologies for the delayed post this week. I am in Italy on vacation and so getting the time to post has been less than easy. The first leg of the trip in Rome there was simply too much to see and do. Thankfully, now that we are taking it easy, I have time to sit down and write this. Everyone was telling my husband and I not to go to Rome in August because it is particularly hot, but the plus side is that all the hotels are extra cheap and there are less tourists than usual. One of the things that fascinated me the most in Rome was seeing a Leonardo da Vinci exhibit near our hotel at Piazza Poppollo.

The da Vinci exhibit got me thinking about a lot of things. I actually picked up a biography about the man which I am still reading through today, and it is immensely fascinating. However, I didn’t need a book about his life to identify da Vinci as a multi-passionate individual, so it was easy for me to understand his interest in many different fields, from science to nature to art. The Ted Talk by Emilie Wapnick (I also linked to it in a previous post) described Leonardo da Vinci perfectly. He kept over seven thousand notes in his journals, jotting down everything from to-do lists to random observations to inventions to drawings of everyday life. If da Vinci got bored with one research project, he switched to another with equal fervor. The man also became fascinated with the most random things, such as the tongue of a woodpecker. This led to many perceiving him as weird.

A photo from the Leonardo da Vinci museum in Rome This picture includes real miniature models of his inventions built with wood.

Society recognizes da Vinci as a genius with insatiable curiousity and incredible talent. The sheer amount of inventions and artworks featured in the exhibit blew me away. Yet a thought kept nagging at the corner of my mind. The more I read about the man, the more I wondered. If da Vinci had been born in the 21st century, would we still regard him as a genius? Would globalization and the internet be a hindrance or a help? Would the world even know his name?

I believe that if da Vinci was born in the 21st century, nobody would have ever known of his genius. While the internet may at first seem a boon to a man like da Vinci, it is also a rabbit hole for endless distraction. We know from descriptions written about him by friends that da Vinci was a distractable man. The man had many inventions tossed aside, such as scuba diving gear that was never usable by an actual diver. Luckily for him, this didn’t mater because there was plenty of other things for da Vinci to learn and discover. There was no need to spend a decade deep diving into a subject like specialists do today. That is because 500 years ago most subjects didn’t have much material to learn yet. After all, fields like medicine, natural science, and psychology were just being defined at that time.

Another image from the exhibit.

There is another reason I believe society would not recognize da Vinci as a genius in the modern day. That is marketing. Combining globalization with the internet means we have a world where everyone is competing for attention. I doubt marketing would have appealed to him. I definetely can’t imagine him devoting time to analzying Google’s search algorithm. Not when there are so many other interesting things to learn and discover. People learn marketing because they want to be seen and discovered. Yet da Vinci was only discovered because he was commissioned by wealthy patrons to make art and invent devices. Because of the money he earned, he could afford to pursue his curiosities. This was mentioned several times in the exhibit. This is what he really wanted.

Obviously there is no way to prove to you for sure if da Vinci would be recognized by society as a genius in the 21st century. The broader point I wanted to make is how much more difficult it is today as a multi passionate individual. Every field today has specialities with sub specialties on top of them, and most of them takes years to master. The only way to master multiple specialties is to become a workaholic, such as Musk who famously stated he works 120 hours a week. That is not sustainable, or healthy. Ultimately, being born as a multi-passionate individual in the 21st century can feel like being dealt a tough hand.

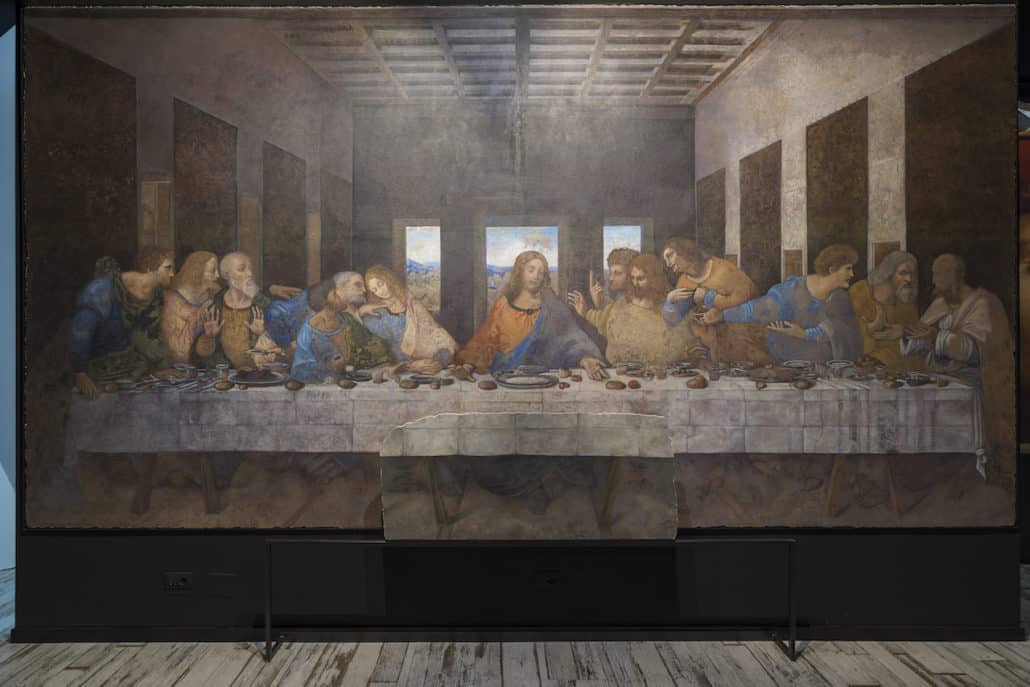
Even the famous Last Supper began disintegrating quickly because da Vinci used an unverified experimental technique.

Still, I like to think we can take some solace in the fact that, even someone as brilliant as da Vinci might have been overlooked in todays information overloaded world. At least for me, when I am feeling insecure, I find it a comforting and reassuring thought.

If you enjoyed this article, consider following me on Twitter @nadyaprimak or if you need more tips on breaking into the tech industry, you can read my book “Foot in the Door”.
Recovering From Creative Burnout

It might surprise some people reading this, because I’ve been publishing these blog posts every week for a month or two now, but I have been recovering from creative burnout for quite some time. Part of this is because of my last game development experience I wrote about in my last post, Navigating Your First Game Development Contract. Part of it is because it’s difficult in the saturated social media world to receive feedback for your creative endeavors. Yet another part is our human tendency to compare our work to other creatives who might be more successful than ourselves.

None of the reasons listed above are more valid or more justifiable than others. The worst thing you can do for yourself when you are recovering from creative burnout, is to beat yourself about it. Not only will that fail to get you out of a slump, it will actually make you feel significantly worse and may even lead to depression. In fact, it might seem illogical but the first thing I recommend doing is accepting that it is okay to be in a slump. We are all human beings, and human beings are not perfect. Therefore, you can not expect yourself to go through life never experiencing any creative slumps. They happen to many of us, and we can overcome them.

One of the first things I noticed about my slump was that starting a new project felt like a completely overwhelming task. My energy reserves felt depleted, probably because I used most of them up on my last project. As creative people we are using our right brain constantly and it can get worn out, like a muscle. This is especially true if you just finished tackling a large project. So, have a little sympathy for yourself. I’ve found that when I’m feeling down it helps a lot to practice loving kindness meditation. It may seem like a small step, but it’s important to gain some of that confidence back. Believe you are worth comfort and respect. That starts with loving yourself!

What can you do once you are feeling a little bit better? I suggest starting with small things. Projects that you can share with friends and loved ones to gain back a bit of that validation and start feeling good about yourself again. If you’re a painter, that might mean making miniature landscape paintings on tiny canvases. If you’re a musician, maybe you remix an old track or hit up an old friend for a collaboration. Writer? Maybe you write some flash fiction. Game developer? You might look up game jams on itch.io that have strict limitations on time and complexity.

This self care wheel includes lots of ways to practice loving kindness towards yourself.

The point is to take baby steps toward getting back into your full creative practice. Have patience with yourself. It might require a number of small projects, and you might even have to revisit the first step of practicing loving kindness and compassion for yourself if one of these small projects doesn’t work out the way you hoped or you feel some resistance. If you are burnt out, you should focus on having compassion for yourself and practicing loving kindness.

It is likely that if these small projects feel exhausting or give you no sense of accomplishment, then you experiencing severe creative burnout That doesn’t mean you are broken. It just means you need to give yourself a little bit more time recovering. Focus on rest and relaxation before picking up your creative practice again. Don’t force yourself to work on something creative if it doesn’t give you any sense of joy or excitement.

Another important thing: whether you are burnt out or just in a slump, reduce your time on social media. This goes especially in terms of following successful creatives. Even if think we are just admiring another creatives work, subconsciously we still compare ourselves and feeling worse. If you know you have that kind of masochistic streak, you can temporarily delete some of the social media off your phone. That way you don’t end up mindlessly browsing and feeling worse without even realizing it.

The “do everything” mindset is what often leads to burnout. That is why baby steps are so essential.

Finally, remind yourself that motivation is good, but it doesn’t necessarily come before action. In fact, more often than not, motivation and action are closely linked, and action actually comes first. With the case of creative projects, oftentimes we begin making something, then we become more motivated by our progress, and the cycle repeats itself. So don’t be surprised if your first small project feels a little bit tedious at first, that is normal!

There is a ton more I could say on this subject. Recovering from creative burnout ties into our general mental health and there are tons of discussions around that topic online. However I want to provide practical advice so you can get started quickly. Feel free to comment where you are at in your slump recovery journey, and I will try to offer my best advice. You can also tweet at me @nadyaprimak. Good luck with your recovery journey!

How the Tech Industry Discourages Multi-Passionates

I wrote a post a few weeks ago about how I sometimes regret specializing in a front end development framework. Mainly because I inadvertently pigeonholed myself into work with outdated technology. What I realized I might have been accidentally implying in that post is that the tech industry therefore prefers multi-passionate people. I wanted to correct this implication because it is extremely incorrect, in fact I would argue that it is the opposite. There are not a lot of creative jobs in the tech industry, at least not if you are a developer. This is what makes it especially difficult for multi-passionate folks.

Technical interviews, especially for developers, are grueling. It is not uncommon to have one or two coding tests, sometimes with multiple developers watching you code live and taking notes while they’re at it. I’ve had cognitive assessments, personality tests, multiple choice questions, timed exams, and everything in between. What sucks the most is that almost all of these tests are designed to assess your left brain. That is, how good you are at algorithmic thinking, or logic puzzles, or your depth of understanding a specific programming language.

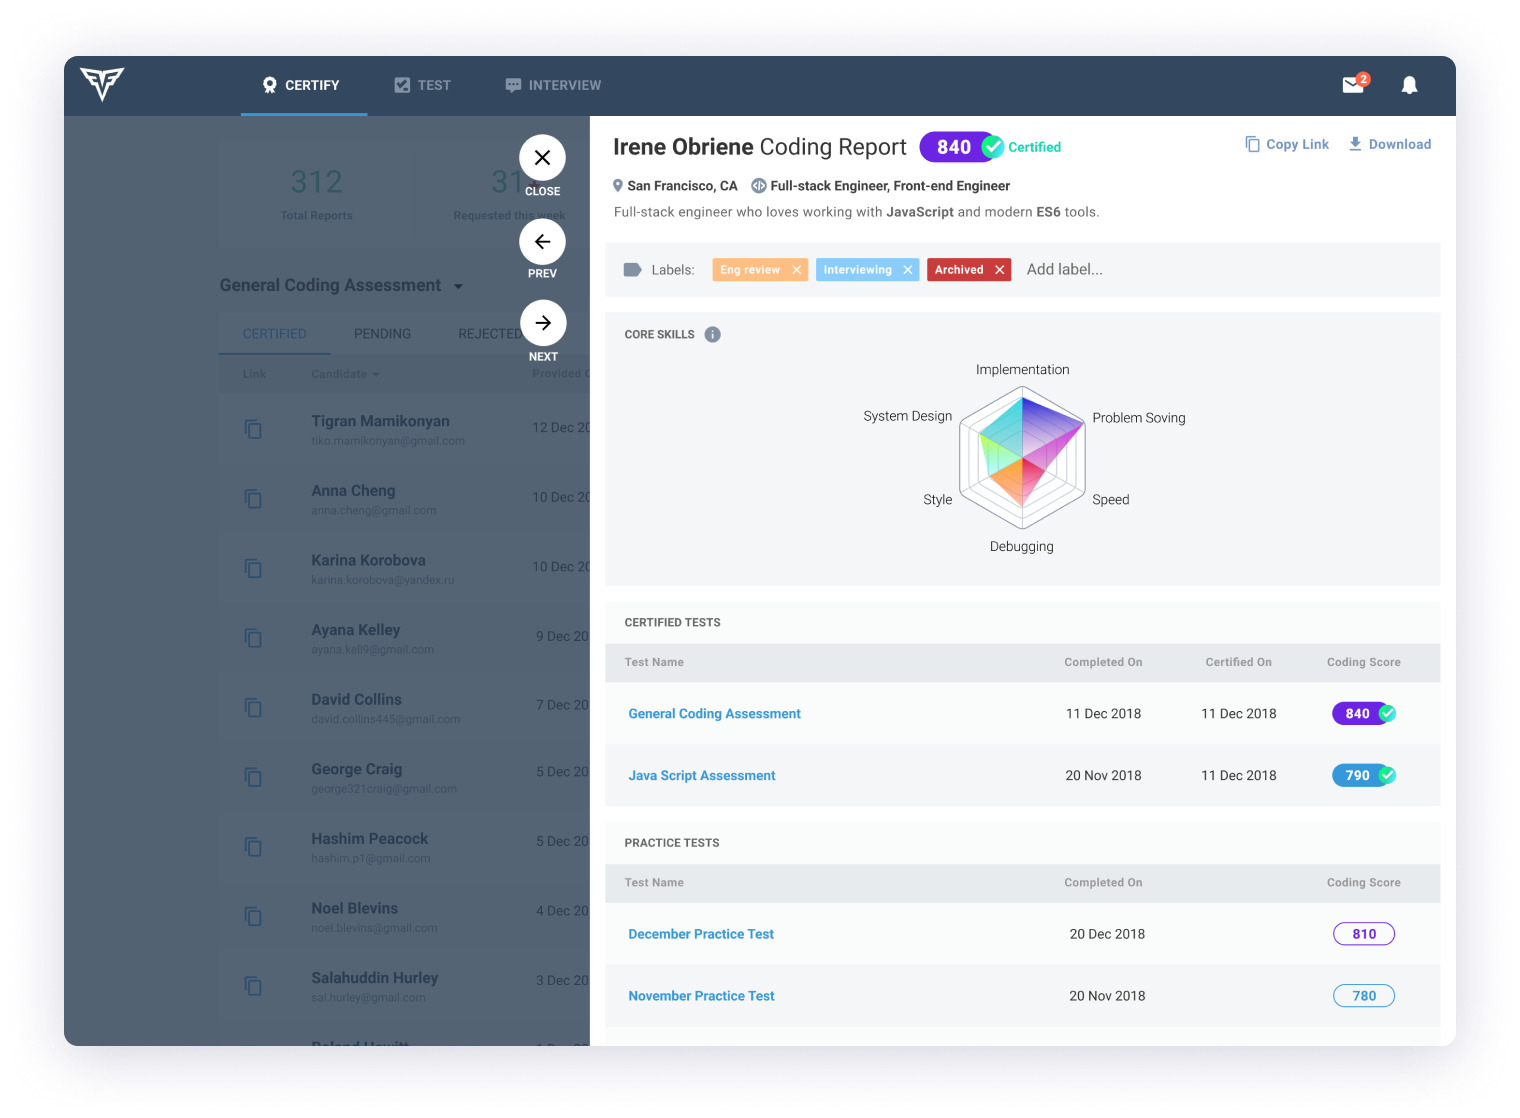
Coding reports like this discourage people who are looking for creative jobs in the tech industry

It’s a real frustration for someone like me, who has a mixture of skills in user experience, web design, and front end development. I often find when I’m looking at jobs that the ones which list this mixture of skills as “desired” are also the companies which are very small and basically just want to have one developer that doesn’t mind “working under pressure” (sidebar: if a job asks you about how comfortable you are under pressure, you should probably run away). Then the jobs which specifically want a “front end developer” couldn’t give a damn that I know my way around Photoshop, or that I have an online portfolio that showcases my game development, or that I have interests outside of technology at all.

The closest thing I found among creative jobs in the tech industry that I came across was being a UI developer, which crossed the boundary between user experience design and programming to some extent. But it was still a far cry from truly stretching my creative muscles.

Of course I would not write this if I thought I was the only one who experienced this frustration. There is a ton of gate-keeping in the industry, which you can read about here, here, and here. Not expressing enough passion about coding or not being up with the latest frameworks can easily cost you the job. As a result, people in the tech industry often feel pressured to give up their hobbies and their other interests and spend both their time inside and outside the office brushing up on trends, researching new tools, and making side projects to stay fresh.

The gatekeeping is real. Probably from StackOverflow.

This is a huge turn off for most multi-passionate folks. They tend to get bored doing the same thing each and every day. When they first discover a new interest they might become intensely absorbed in it for a while. But eventually that intense interest tapers off and is replaced with something else. Emilie Wapnick discusses this phenomenon in her fantastic TED talk, which I highly recommend.

The tech industry receives so much criticism for excluding people and ideas. Yet it continuously encourages developers to specialize in more and more specific tools. What the industry needs most right now is people who value the the long term happiness of their customers. That includes the user experience, genuine human interaction, and taking privacy seriously. To do this well, employees should be able to put themselves in the shoes of their customers. Hiring people who have diverse experiences and a wide range of interests would certainly help. Hiring people for their single-minded obsession with technology will have the opposite effect. It will continue to fuel the delusion that all problems can be solved with more technology.

The lack of diversity also discourages multipassionate folks

Some might infer from this that I want to do away with all coding tests. No. I am not advocating for an extreme approach. I think currently the industry skews very far in demanding employees to live, breathe, and eat code. That it is not conducive to a collaborative and open minded workforce. Of course it also relates to the bigger problem of toxic work culture. That, unfortunately, is another can of worms I won’t get into in this post.

Hiring in tech is broken. Having a single minded focus on the developers technical skills dehumanizes them. It also makes multi-passionate folks feel like they need to fit a very specific mold. I believe it is also the reason why so many companies don’t invest in good UX researchers and designers. After all, those skill-sets bridge different industries and require a more multi-passionate approach. Many companies seem to not see the value in anything that is not pure code. Basically anything that doesn’t follow the motto of “move fast and break things”.

That motto has NOT aged well.
Part of the reason I started this blog was to have an outlet to talk about all of my interests. It’s incredibly rewarding to be able to write about a multitude of topics. While there are not a lot of creative jobs in the tech industry for developers, there are other ways to stretch your creative muscles. I do it by refusing to force myself into a niche that I would get sick of after a few weeks. The tech industry is changing, albeit not as quickly as I would like. I hope this post reaches the people who can spread the message that multi-passionate people in tech should be embraced rather than estranged.

If you enjoyed this article, consider following me on Twitter @nadyaprimak or if you need more tips on breaking into the tech industry, you can read my book “Foot in the Door”.